Master Panoramic Photography
Location: Southern Iceland
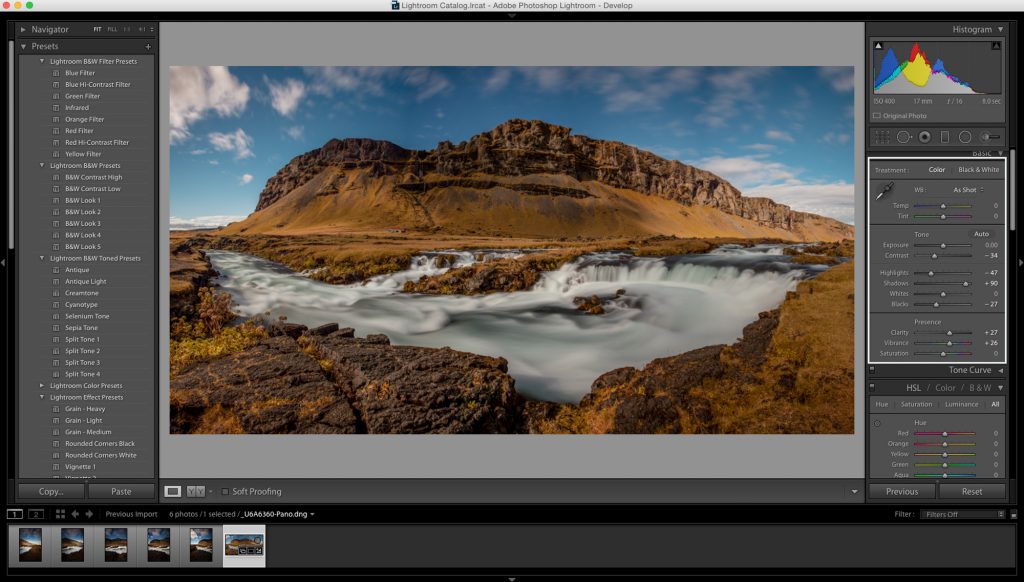
Goal: Make an image that captures the beauty of the waterfall and rapids from end to end.
Thought process: Capture a series of images at a slow shutter speed that will be merged into a panorama.
Behind-the-scenes story
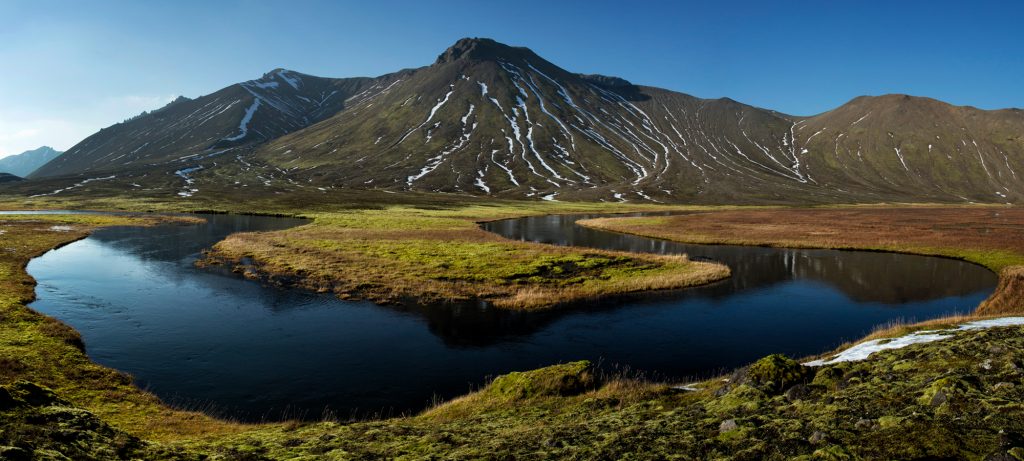
This behind-the-scenes story for this image actually started the previous year on one of my Iceland photo workshops. I like the image you see here, but when I returned home, I wished I shot a panorama.
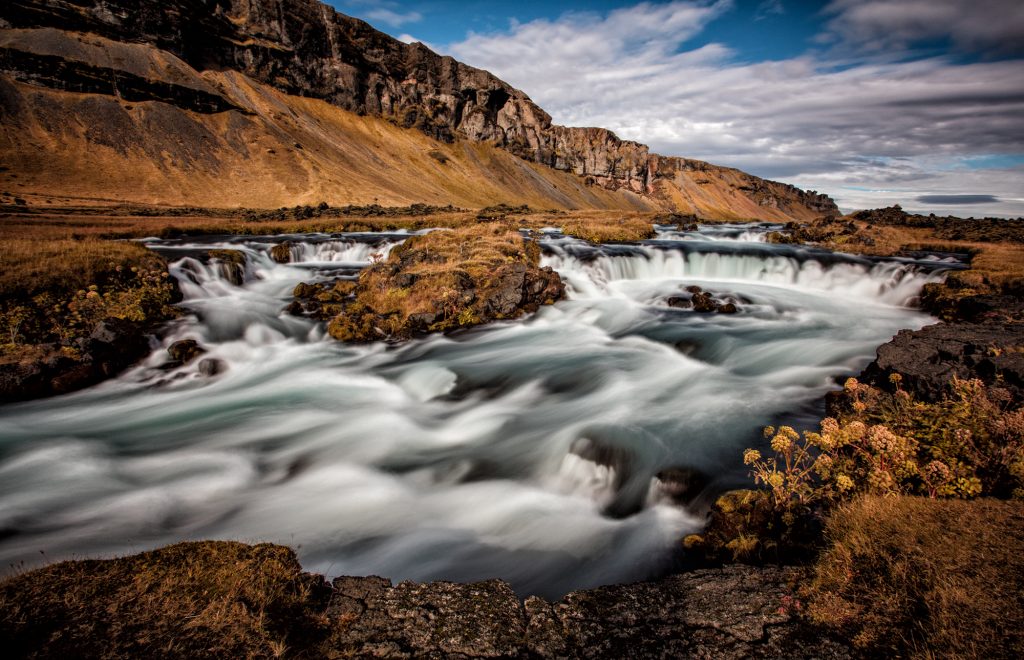
This photograph that opens this chapter (taken a few minutes before I took my pano), is similar to the preceding image. The main difference is the color of the light (due to shooting at a different time of day) and the color of the foliage (due to shooting at a different time of the year). I share these two images with you to illustrate the effect of light and timing on an image.
Basic Pano Photography Tips
To get a seamless pano that does not show where the images were stitched together, you need to follow these steps:
- Set your camera on manual exposure and meter the brightest part of the scene. This is your exposure for the entire pano. That setting will ensure that no part of your pan will be overexposed. It will also ensure an even exposure throughout the pano as opposed to using one of the automatic exposure modes – which would result in different exposures in your pano. Different exposures will result in dark bands in the sky between images.
- Use a wide-angle lens for maximum depth-of-field.
- Set an aperture that will give you everything is focus, usually around f/8 or f/11.
- Set the white balance for the existing conditions (daylight, cloudy, etc.). That setting will ensure consistent color throughout your pano.
- Hold your camera vertically.
- Frame the scene with extra space at the top, bottom, left and right of each shot because some of the image area will be cut off in the pano-making process.
- Shoot from left to right or vice versa and overlap your images by about one-third.
- Use a tripod when shooting at a slow shutter speed (as I did here). All the other panos in this chapter were hand held.
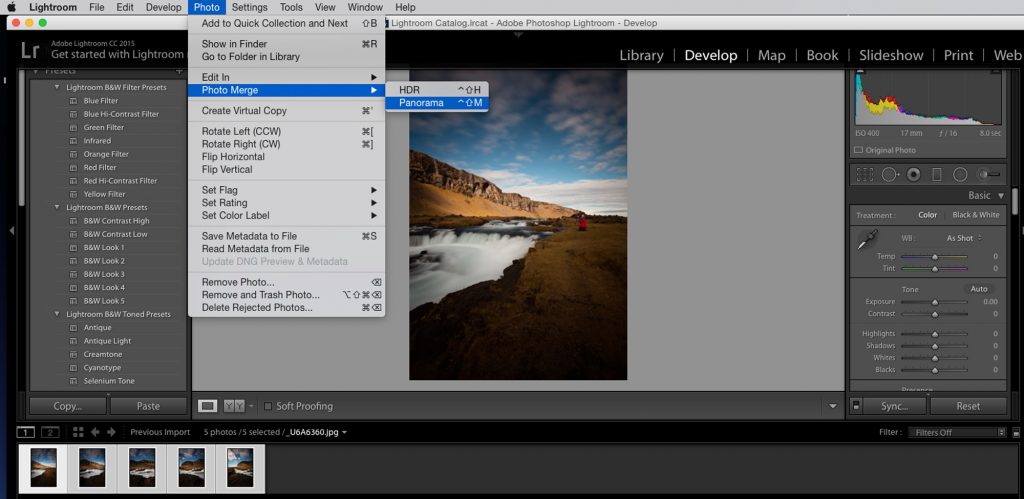
Image Pano Processing Technique
Import your series of images (five for my pano) into Lightroom. For maximum image quality, use your original RAW files, but you can use JPEGs, too.
In the Develop module, select all the images, then go to Photo > Photo Merge > Panorama.
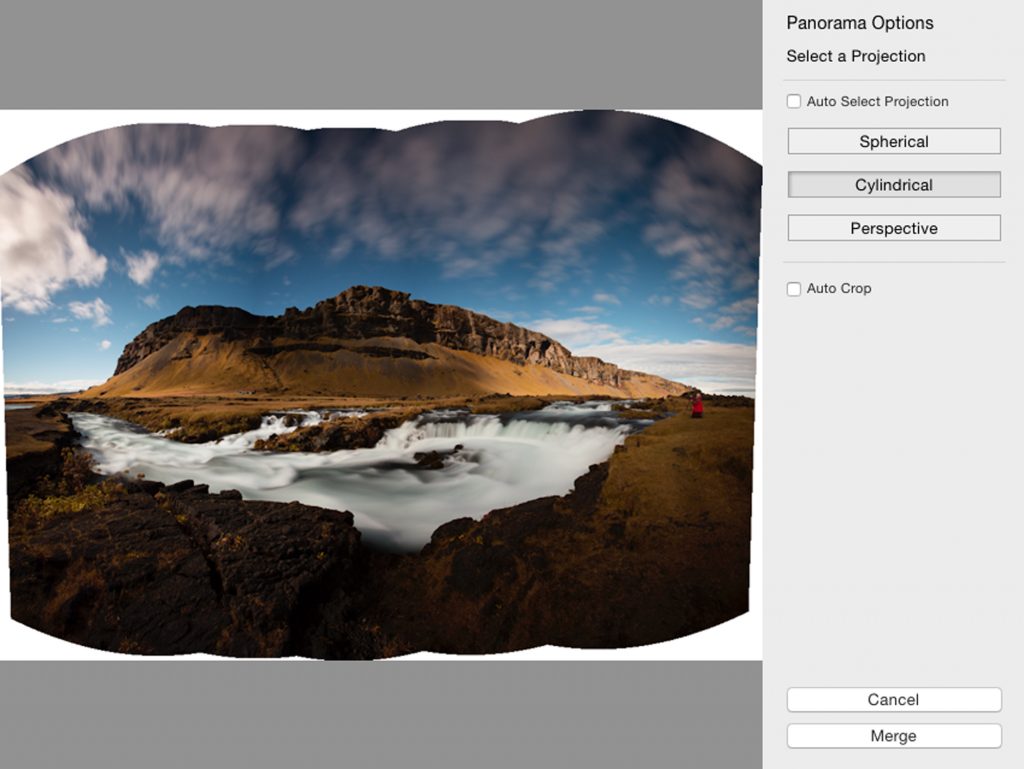
When you select Photo Merge, your images will seamlessly be stitched together – if you overlapped correctly. As you see in this screen grab, and as I mentioned, some of the top, bottom, left and right part of the image are cropped off in the pano-making process. You could check the Auto Crop box for a full-frame image, but I like to crop the picture in Lightroom to my liking, not Lightroom’s.
How much image area that is cut-off area depends on two main factors: the lens in use, and how many pictures you take. The wider the lens and the greater number of pictures, the more image area you lose.
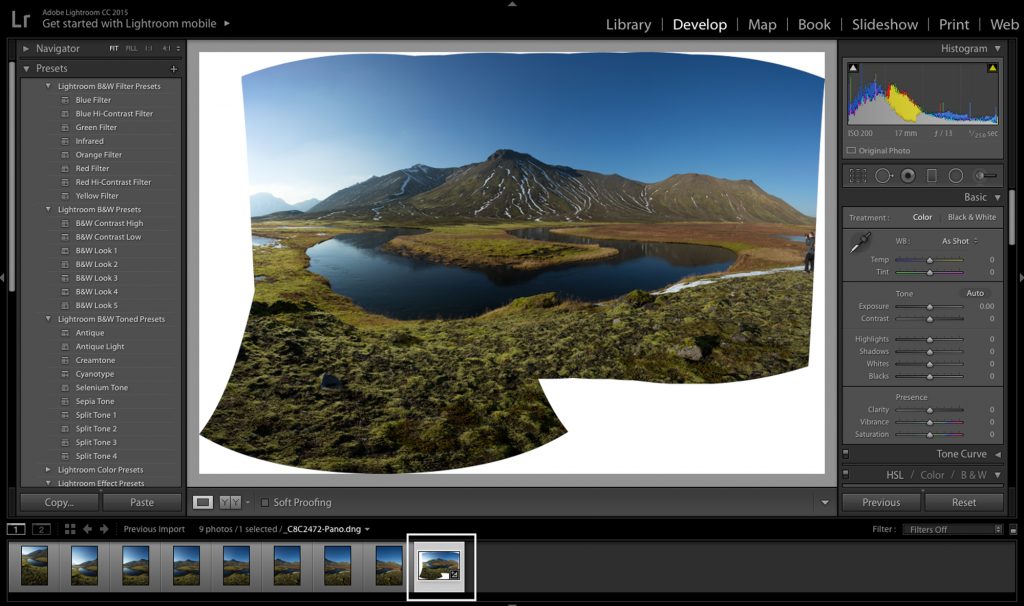
In this screen grab of another eight-shot Iceland pano, you can see that a fair amount of image area is missing from the bottom right of the frame. Had I wanted that area in my pano, I would have been out of luck. The moral of the story: leave more than enough extra space when composing your original images.
Once my pano was stitched together, I made the following adjustments in Lightroom:
• Increased the Contrast – for an image with more impact
• Reduced the Highlight – to preserve the detail in the water
• Opened up the Shadows – for a clearer view of the shadow area
• Increased the Blacks – to add a bit more drama to the image
• Increased the Clarity – for a more detailed image
• Boosted the Vibrance – for a more colorful image
• Used the Dehaze filter – for clearer sky
Closing Thoughts
Here are a few more thoughts on making panoramas:
I know I said this, but this if very important: always remember to set your camera on the Manual exposure mode. If you do, even when the sky goes from light to dark, you will not get dark bands in the sky between images. As an aside, notice the double “S” curve in this mage. That is what drew me to make the pano.
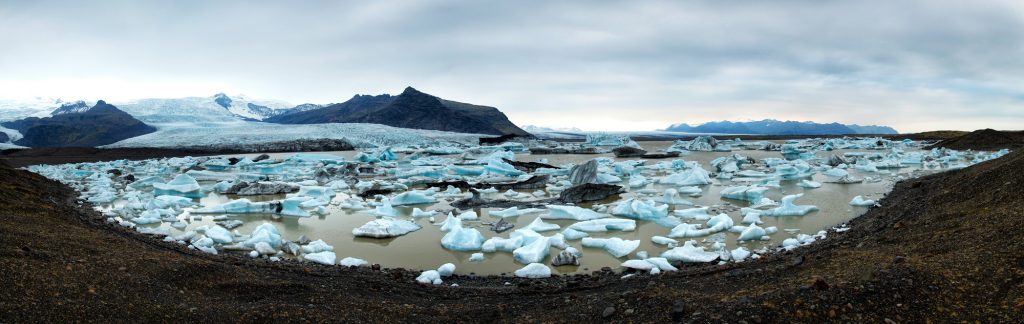
Panos are great. Panos are fun. However, if you take too many images (nine here) when you make a standard size print, the image area will be small. I made this pano of a Glacier Lagoon in Iceland.
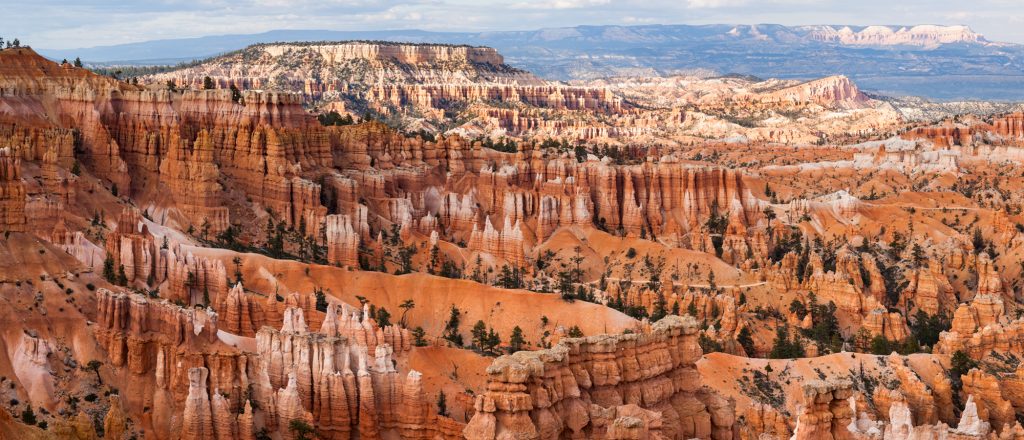
A big benefit to making a pano is that you have a big file. The file for this pano was almost 400 MB – large enough to make a very large, even couch-length, pano. I made this pano in Bryce Canyon, Utah.
Tech Info for Opening Image
Camera: Canon 5D Mark III
Lens: Canon 17-40mm @ f/17
Tripod: Really Right Stuff tripod and ball head
Camera settings:
• Manual focus – to ensure focus throughout the pano;
• ISO 400 – which was actually a mistake (I should have been on ISO 100 for a cleaner shot), 8 seconds – to blur the water, f/16 for good depth-of-field.
About Rick Sammon
The intrepid and tireless team of Rick & Susan Sammon have produced 38 books and also shoot online classes for KelbyOne. They also lead photo workshops around the world, from Alaska to Antarctica.
“I use RRS tripods and ball heads in front of and behind the camera – because the gear has never let us down.”
Rick Sammon
http://ricksammon.com/