Panoramic Photography with Tom Kingsford
A Step-by-Step Guide to Capturing Landscape Panoramic Photography
Tom Kingsford
Photography has captured my heart and imagination. Historically, I have been someone with very little creative outlets in my life; I grew up a Type-A business major with a finance degree and sales background. Not exactly the typical photographer upbringing. I spend as much time in my beloved Colorado mountains as possible as an athlete all of my life. Five years ago, I found photography and I’ve been hooked ever since. I try to consume as much photography information as possible, learning and growing each step of the way. Approximately three years into this crazy adventure, I attended my first organized workshop with Stephen Oachs and the great folks at Aperture Academy. Panoramic photography was the focus, learning how to capture correctly in the field and process correctly in the post processing phase. This experience opened my eyes to the staggering amount of consideration it takes to properly shoot and process a glorious panoramic image. Since then, I’ve continued my learning and passion for creating panoramas.
I often find myself in scenarios with huge open vistas, and the scope of capturing these vast landscapes continues to challenge me at every turn. This is what I truly love about photography: the constant learning and the ever-changing conditions. Each trip is different and presents a unique set of considerations. Even the same destination can have wildly different conditions based on weather, time of year, season, water levels and more. With all these factors in mind, I strive to get deep into the back-country with my gear to capture images most people don’t, because of the effort it takes to reach these destinations. When I get to see the look of wonder and awe on someone’s face as they view a crystal clear print of a view across the mountaintops at 12,000 feet, it makes all the work, effort and sacrifice melt away.
In order to achieve this, it requires a specific approach, patience and specialized gear. For me, that gear must be reliable and lightweight, as each pound counts when I have to carry it great distances on my back.
Planning:
I’m a planner, back to my Type-A personality. Google Earth is your friend when shooting panoramas (and any other field photography). Do as much pre-work as you can to understand the best time of day/night to shoot, what your best access points are, and how you will travel in and out of your desired location. Research what challenges you might find, if there is a lake can you access it to create a reflection shot, etc.
Another one of my go-to tools is an iOS app called Photopills. This app is comprehensive and will allow you to plan the sunrise/sunset times with location, locate the stars, and understand what shadows will appear at what time of day to help you plan accordingly. It also has a handy depth of field calculator for getting your shots as sharp as possible given the conditions and your lens/camera setup.
Look for large scale scenes, things that contain interesting lines and lots of depth. Lighting is always key, so plan accordingly to anticipate the location of the sun to create the desired effect. Movement can be a tricky consideration, so look for what is moving in your scene and plan accordingly. If there are people, traffic, clouds or boats in your scene, think through how you want these represented in your final image. The movement of the sun also is a consideration and for best results you want a consistent exposure throughout all of your shots.
Gear:
Gear can be a very loaded topic, and I am guilty of falling into the gear envy trap myself. With that said, I am very much a believer in only buying better gear if it allows you to capture a photo that you otherwise could not. This is the case with panorama photography. Stability and precision are imperative to this shooting style. Assuming you already have a DSLR camera, here are a few of the items I use to make this possible.
1. Tripod – sturdy, sturdy, sturdy. This is your foundation, so be certain it won’t be shaken or thrown around by wind, someone’s feet, shifting sand, mud, water, etc. Use a hang-bag to create even more stability. Look for a rock solid solution here, like the RRS TQC-14: Quick-Column Series 1 Tripod. This is a big investment, which will pay huge dividends in the long run.
2. A panning system – this is the next most important piece of additional gear you will need. Once again, you get what you pay for in this realm. There are many options here, from motorized to manual and heavy to lightweight — which I won’t dissect here. In my first workshop pano experience, I did not own this particular set of gear and thus, rented for the workshop. It was a cheaper version and frankly, was awful. I learned in the three day workshop: get good gear and you get good results. I have used the following setup for two years now and it has never let me down.
- RRS Multi Row Pano Kit
- RRS BH-30 Compact Ballhead
3. Lens – find the sharpest lens you have, edge to edge. Again, we are after a sharp photo to increase our level of detail in large print formats. I find a bit of compression makes the scene expand, creating a greater level of detail and resolution. A lens in the range of 100mm or higher will typically yield nice results. If you don’t have a lens this big, don’t be afraid to rent one. Today’s rental market is very useful for testing out new gear you may need for new shooting styles. There are many to choose from, places like Pro Photo Rental or Borrowlenses just to name a few.
Capturing:
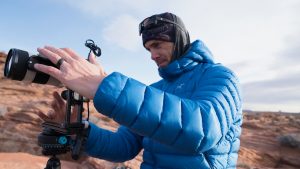
Stabilize that tripod, then stabilize it again. Why? Because this is your foundation, if this isn’t right, the entire capture process will suffer. Next, level the tripod using the bubble level on your ballhead. Then, once your camera and panning system are setup, double check that you are still level. All set? Ok, now let’s get to shooting. Visualize the scene in front of you, gauge how far left to right, up and down you would like to capture. Take in the light, how is the sun shining and are there clouds moving that may change your exposure mid-shot. Lastly, look over the motion within your frame. What might be moving that you want to account for?
Now, based on your lens, you will want to plan your panning distance to ensure you overlap your images by roughly ⅓ to ensure the best stitching in post. Remember, when shooting multi-row, you may be capturing frames for several minutes, so plan accordingly.
Processing:
Now that you have captured your panorama, it is time to combine them in post. Today’s software is getting really good at this step, with many options to choose from. I’ve used the Adobe Creative Cloud for many years with great success. Occasionally, even the photo-merge function built into Lightroom does a satisfactory job of stitching your images.
Printing:
In today’s digital world, I find many photographers don’t print their photos very often. This is one of the most fun steps in the process. Pick a nice large print size and go for it. I now have a couple of prints as large as 30×60 printed in my home and I love them. Crystal clear, no pixelation and extraordinary detail. Get out there and shoot, but don’t neglect to pick a favorite or two and have them printed nice and large!
Tom Kingsford has been fascinated with adventure and beautiful landscapes his entire life. An accomplished traveler, explorer and photographer, Tom works tirelessly to capture the magic of our natural world. Specializing in outdoor, travel, adventure, and lifestyle subjects, Tom creates powerful images that are punctuated by wild landscapes. His drive and experience has allowed him opportunities to work on global campaigns, speak in front of hundreds of people, influence product development, educate, and connect with amazing people.
Before becoming a photographer, Tom ran sales teams for Technology Giants and startups alike. After a 20 year professional career working for companies such as Apple and NetApp, Tom has turned his passion into a lifestyle. Tom attended the University of Kentucky, where he earned a business degree in Finance. In 2012 he began to discover his passion for photography, idolizing the timeless work of Jimmy Chin, Tim Kemple and Chris Burkard. After moving to Colorado in 1999, he has spent as much time outdoors as possible. Nothing makes him happier than being in the mountains, climbing, skiing and creating images. Today, Tom lives in Boulder, Colorado with his family.
