RAW Part 1 – Post Processing with Max Foster
RAW – Part 1
Max Foster
Introduction to the Series
In partnership with Really Right Stuff, I am pleased to announce a new series focused entirely on photo processing! Over the next several weeks, I will be publishing a series that covers the depth and breadth of photo processing, specifically for landscape and cityscape scenes. The RRS blog features incredible photos, shooting tutorials, and inspirational articles. Until now, however, there has not been a processing resource available on the blog. This series will be useful for those new to photography and post processing, and also those that have been doing it for years. There are countless tutorials on the web today, but I want to offer a complete front to back resource for the RRS readers. This tutorial will focus not only on how to use editing tools, but also explain how to approach your images.
Anyone that has been fortunate enough to use a RRS product knows the effort put into design, quality and function. RRS tripods and support equipment are an integral part of my photography workflow, and enable me to maximize image quality from the moment I click the shutter. With that in mind, I wanted to create a processing series that allows photographers to maximize their images’ potential. There are two main aspects to creating quality imagery; technique in the field and processing. Technique in the field is the most important, but quality processing can elevate your work to the next level.
This series will be broken up into several chapters in chronological order. Along with the tutorial text, I will provide detailed visuals with images and videos so you can fully grasp each concept. Each topic will be addressed, some with more detail than others based on usefulness to the landscape photographer. At the end, there will be a variety of full start to finish edits that will help show you the workflow in full.
Are you ready to take your images to the next level? Do you want to create images that stand the test of time? Maybe you want to print your images to hang on your wall or sell to clients? Over the next several weeks, we will give you the powerful techniques needed to quickly and repeatedly bring out the best in your images so you can accomplish all that and more!
Welcome to Post Processing with Max Foster
Below you will find the outline of the series. We will be going through each topic utilizing Adobe Lightroom/ACR, Adobe Photoshop, and the free Google/NIK Efex plugin collection. You can achieve many of the same results using other software, but Adobe products are ubiquitous in the world of photography so that is what the tutorials will utilize.
RAW Series
1) Introduction to the Series
2) Vision and Execution
3) RAW Workflow Overview
4) Lens & Distortion Corrections
5) Presharpening
6) Noise Reduction
7) Camera Calibration & Saturation
8) Global Adjustments
9) Targeted Adjustments (Brush, Gradients, Elliptical)
10) Split Toning
11) Dual Processing Images
12) Applying Changes to Multiple Photos
13) RAW Completion & Photoshop Importing
Artistic Series
1) Artistic Vision
2) Work with the Light – Front, back, side, twilight, night
3) Dynamic Blending
4) Enhancing the Elements in a Scene
5) Artistic Workflow & Final Base File Corrections
6) Luminosity Masks
7) Contrast Adjustments
8) Color – Saturation, Hue, Luminosity, Separation
9) Orton Effect
10) Expert Masking
11) Plug Ins for Photoshop
12) Contrast Types
13) Dodging & Burning – Several Techniques
14) Effective Vignettes
15) Sharpening for Web
Printing Series
1) Creating Print Files
2) Printing Adjustments
3) Using the Histogram for Printing
4) Sharpening for Print
5) Printer ICC Profiles
6) Printer Settings and Paper Selections
7) Printers
Start to Finish Series
1) Start to Finish: Dusk in Vernazza
2) Start to Finish: Through the Mist
3) Start to Finish: Swept Away
4) Start to Finish: Tuscan Dream
5) Start to Finish: Santorini Sunset
Vision and Execution
Before we dive into the tutorial, I want to touch on artistic vision and execution. Artistic vision is more important than ever in landscape photography. With the surge in popularity over the past few years, it may seem as though the genre is heading in a single direction. However, when you search deeper you can find many artists forging their own path and style. Why is this important? I can safely assume that not everyone wants the same photos, in the same light, with the same edits. Landscape photography is an amazing way to express yourself artistically by creating your own style and learning how to successfully execute it. Finding your artistic path is an individual journey, with no right or wrong turns. It will likely change as time passes, you experience new places, and learn more about what it is that you are drawn to. I think that is a good thing, as it keeps things fresh and interesting.
My personal artistic path started by seeing otherworldly looking HDR (i.e. tonemapped, no shadows, etc.) photos of city scenes and landscapes. As soon as I saw them I was hooked and wanted to create my own versions. Fast forward to the present, and now any time I come across an old HDR photo of mine I wonder what I was thinking! The unnatural look of this processing was so over the top and bizarre! Nonetheless, I am thankful that I stumbled across those HDR photos years ago because it was the catalyst to my artistic journey.
This series will provide insight into a workflow that will allow you to develop your own style, not just show you how to make every photo look the same. Every scene is different, with varying qualities of light, color, and contrast. With this workflow, you can enhance the features and light in an image while staying true to the scene itself. The scene may have subtle twilight light with soft shadows or a bright sunburst with intense contrast, but this workflow can be applied successfully to these scenes and more. Most importantly, you will be able to develop your own personal artistic style with subtlety and refinement.
RAW Workflow Overview
I typically shoot two types of images, those that I consider walkaround images or easy edits, and those that I run through my full workflow. This tutorial is going to focus entirely on the latter. At its core, the RAW workflow uses four key tools. The first two almost everyone is familiar with, Adobe Lightroom and Photoshop (I will be demonstrating with CC 2017). Next, there is the Google Nik Efex Suite (thankfully this is now free), and finally the Tony Kyuper TKActions panel. I highly recommend these plugins/extensions, as they have some very useful tools that can greatly speed up the entire workflow. All the actions in the TKActions panel can be performed manually, but the panel is so well designed and user friendly, it is an integral piece of my workflow.
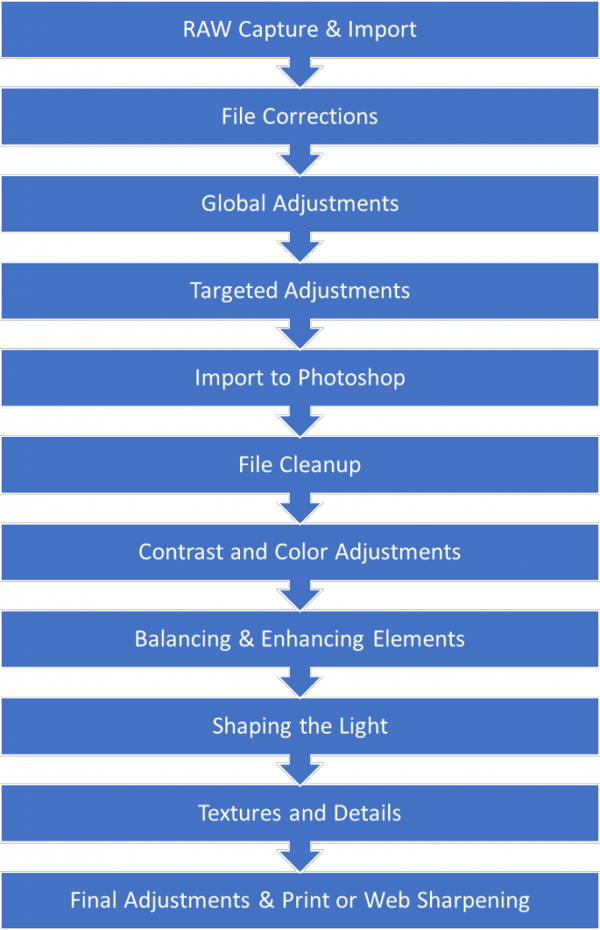
The basic overview of the work flow is below, which is meant to be followed in this specific order:
I will be demonstrating with several photos throughout the series in order to best illustrate what I am describing. These photos are unedited, RAW files. Additionally, at the end of the series there will be several start to finish edits to show you the entire process on a single photo. These will be very useful, as the subject matter in each will vary. So, with that, we will jump right into the first edits.
Lens Corrections
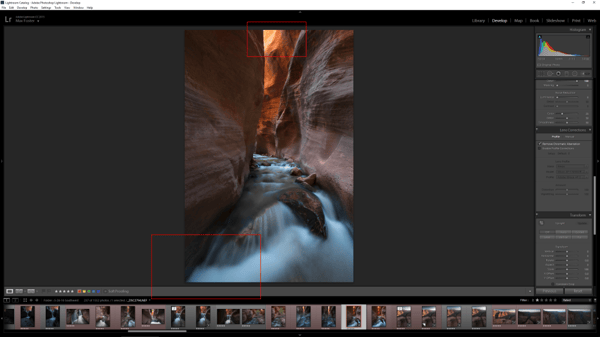
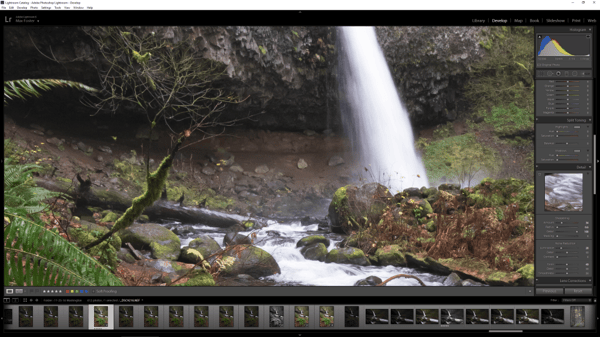
Starting out, I import my photos into Lightroom and open the Develop Module. As seen below:
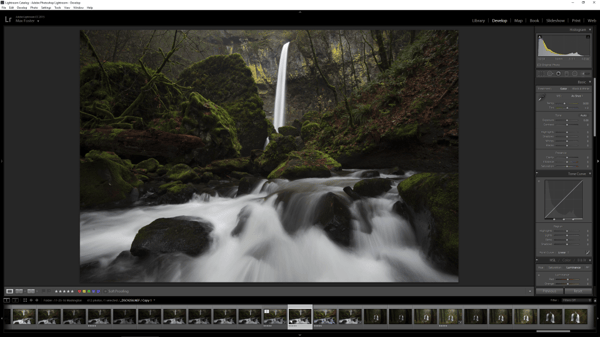
Before making any adjustments to contrast, color, etc., I like to correct any file issues. Depending on the lens, focal length, and light there may be some distortion that needs attention. The two most common and easily corrected forms of lens distortion are barrel and pincushion distortion. Under the Lens Correction Module, I always start by selecting Enable Profile Corrections. If you are shooting with a Lightroom supported lens, it will display the lens details and associated profile. It isn’t always necessary to use this feature, but it can definitely help quickly solve some common issues. For example, when you have a clearly visible horizon line or vertical subjects toward the edges of the frame, distortion correction may be required. The automatic profile can also correct minor vignetting and light falloff. In the first photo seen above of Elowah Falls, I was shooting at 16mm and there was some visible barrel distortion. I was happy with that automatic profile, so I left it with that.
In the shot below of a slot canyon and stream, I was also shooting at 16mm, but I did not want to apply any automatic distortion correction. This photo doesn’t have easily recognizable features that should be entirely vertical or any distracting barrel distortion. Additionally, correcting distortion can result in pushing some prominent features of the photo closer to the edge, or out of the frame entirely. I wanted to keep the small falls and the light at the top of the frame completely in the image. Some of this will be taste specific; not everyone is bothered by a small amount of distortion.
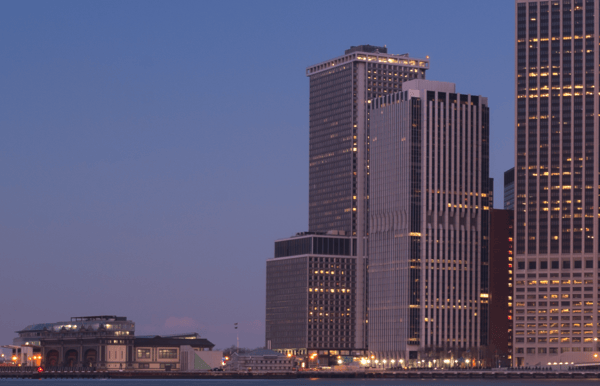
The next photo shows a skyline view of New York City (zoomed in to 100% view). As you can see from the unadjusted photo, there is some serious distortion affecting the buildings. Notice how the towers at the edges of the frame have a strong curve to them? This is the type of distortion that really needs to be corrected. With the automatic profile, most of the problem was corrected, but I also used the manual section to further reduce the barrel distortion.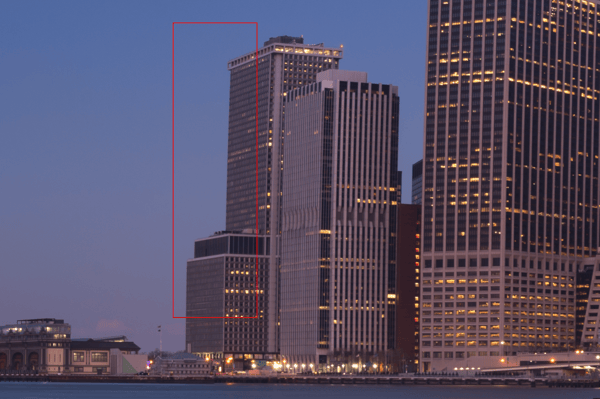
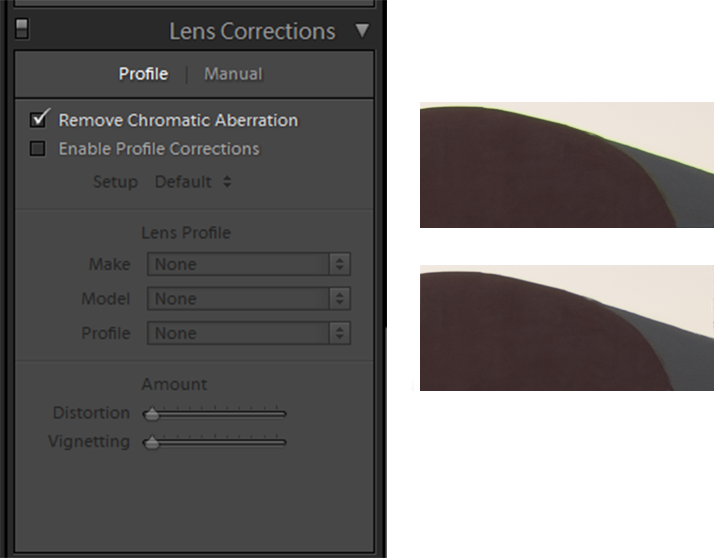
In the same Lens Corrections Module, there is a great fix for Chromatic Aberration, the colored fringing sometimes seen when shooting in high contrast settings. By default, I always check this as I have never seen any negative results from it. It almost always fixes any color fringing without any additional adjustment needed. As you can see below, the profile completely eliminates the fringing at the building’s edge.
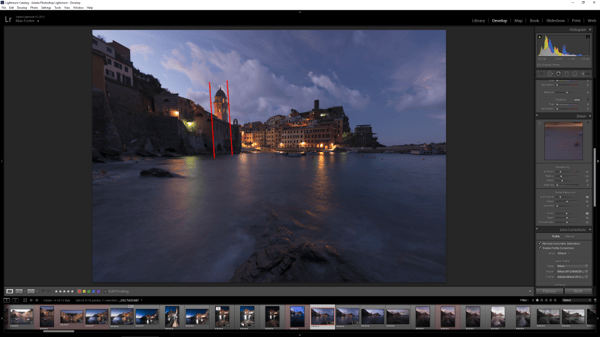
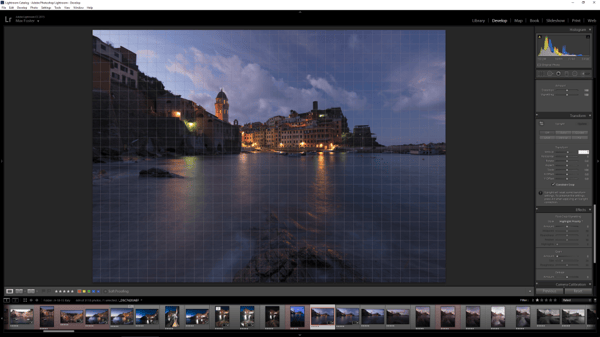
After making these adjustments, it may be necessary to correct for some distortion in the verticals of the image. For example, when shooting with a wide-angle lens you will oftentimes have vertical lines appear as though they are leaning backward (or forward depending on the angle of the sensor in relation to the subject). In the photo below, the buildings appear to lean, but once again, this is easy to fix. By using the Transform Module and the vertical slider, I can shift the lines so that they are vertical once more. I also like to use the Constrain Crop checkbox to automatically crop the image after the adjustment.
For most minor corrections, that is all you need to do. If you find a particularly tough subject to get right with these tools, Photoshop has even more powerful tools for warping and transforming. In that type of situation, it is best to correct as much as possible in Lightroom, and then finish it in Photoshop. We will cover these tools later on in the series.
Presharpening
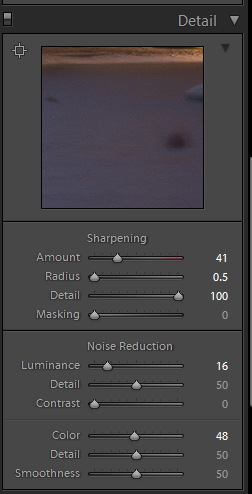
Presharpening, also known as capture sharpening, is a very important step in maximizing the detail and quality of you image. It is not the same as output sharpening, but is no less important. Lightroom and ACR have excellent tools for this, and I find that the best results come with very similar adjustments on all of my images. As seen in the image below, there are four sliders in the Sharpening module: Amount, Radius, Detail, and Masking. In order to keep image quality high, but still remove much of the inherent lens softness seen in RAW files, these adjustments are simple. First, move the Detail slider all the way to 100. Then adjust the Radius to 0.5, which is the lowest setting. Now, set the Amount to 0 and zoom in to 100%. Find an area on the image that has a lot of detail, and center the screen there. Now, slide the Amount slider up until you see the desired sharpness level. For my lenses, this ranges from about 35-45. If you start seeing any white haloing or fringing, you have gone too far. The Masking slider can eliminate the sharpening adjustments in the shadow and highlight areas of the image, which oftentimes do not need any additional sharpening. I usually leave this at 0.
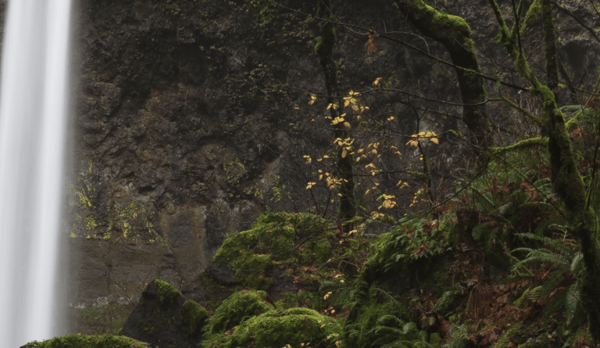
As you can see from the images above, the presharpening is a very effective way to bring back fine details in the image. This will allow us to maximize the fine details and features throughout processing. The settings above are a great starting point for most landscape images, but depending on the lens and settings, you may need to slightly adjust the Detail and Radius sliders as well. Just be careful not to create any haloing or fringing.
Noise Reduction
Cameras today have amazing sensors that produce clean images high into the ISO range. Nonetheless, in the field I try to keep my ISO as low as possible. I like to produce the cleanest, most noise free images possible, so my ISO is usually between 50 and 1,200. Depending on subject matter, it may be necessary to shoot multiple images to capture the scene as intended. For example, when shooting a waterfall on an overcast day, I will usually take low ISO frames for the water movement and nonmoving subjects (like rocks and thick trees), and then take separate higher ISO frames for anything that is moving (leaves, branches, etc). In post, these can be combined to maximize image quality without relying on a high ISO image for the entire frame.
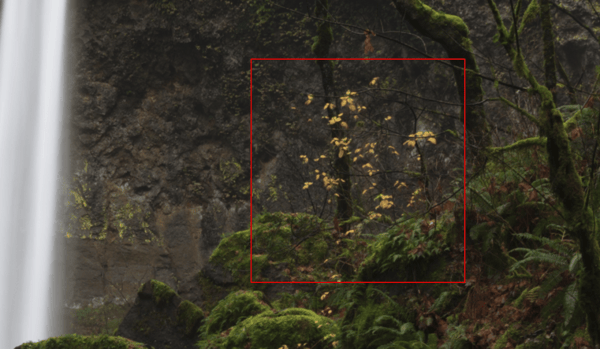
For images shot at ISO 50-200 I rarely need to apply any noise reduction. These files are very clean, but this will be dependent on your camera and the conditions. If noise reduction is necessary, I apply as little as possible, as it can greatly decrease image quality (photos of the night sky are an exception). A good rule of thumb is to zoom in to 100% when working on noise. As seen in the 100% zoom view of a waterfall image below, ISO 800 left some minor sensor noise and color noise. This is definitely still a useable file, but will benefit from noise reduction.
I start by turning sharpening completely off by dragging the Amount slider to 0. This will allow us to see the pure effects of the noise reduction. With this particular file, the noise reduction looks best at 20; this significantly reduces sensor noise and yet still preserves details nicely. If you push this noise reduction too far, your image will begin to look like a painting, completely eliminating details. If the image has any color noise, the color slider also does a nice job of removing the noise while preserving detail. I pushed this to 49 on this particular file. After the noise reduction is complete, then I turn bring sharpening back in by increasing the Amount slider. On images that need a large amount of noise reduction, you will want to keep the presharpening lower than normal. If you sharpen to the same level of a low ISO noise-free image, you will start introducing more noise and artifacts. You can see the noise adjusted image below, which looks much better. As mentioned above, if you don’t need to apply noise reduction, then avoid it if possible.
