General Macro Theory

This image consists of five single macro shots of sea anemone stitched in Photoshop to product a single macro pano.
Final image size 15,429×5131 pixels.
The absorbing realm of closeup photography (meaning image scales from 1:10 to 1:1) and photomacrography (meaning image magnification from 1:1 to 20:1 or more) often calls for special techniques and special tools to achieve optimum results.
For nature and wildlife subjects, it is prudent to plan for up to ~ 2X in the field, and to ~ 4X in the studio. In the closeup range to ~ 1:5 (20% of life size), conventional optics and normal techniques suffice, but the going gets tougher as the subject gets smaller. These problems involve: gaining sufficient working distance, focusing accuracy, depth of field, resolution loss due to diffraction effect, desired final (enlarged) image resolution, and, of course, lighting. There are many books that propose solutions to these problems, but we especially recommend books by John Shaw.
While screw-on closeup lenses (particularly the special two element types corrected for use with telephoto lenses, e.g. Nikon’s 3T, 4T, 5T, 6T and Canon 500D) and supplementary extension tubes and teleconverters will get you close, there will come a time when every serious closeup shooter feels the irresistible desire to invest in what the trade calls a “macro” lens. These are special closeup lenses (also quite usable for general photography) that are highly corrected for close range imaging, and are capable of focusing all the way from infinity down to 1:2, or even to 1:1, all on their own.
“Macro” Lenses
The most widely popular “macro” lens is about 50 to 60mm in focal length. That’s good for stamps and coins, but lousy for nature and wildlife work. That focal length is too short to provide adequate working distance, and the angle of coverage is too wide to isolate the subject.
The next step is a “macro” lens in a 100mm to 105mm focal length. These are better, but still entail a lot of compromise in action. Here’s why:
- Working distance: It’s simply not adequate for live subjects. The modern 105mm focal length “macro” lens turns out to be 80mm when it’s close-focused
- Angle of coverage: It’s too wide to provide good control of background selectivity. It is very difficult to truly isolate the subject and make it pop.
- No tripod collar: Most 105mm “macro” lenses don’t have a rotating collar. Given the difficulties implicit in careful closeup focusing and framing, it is agonizing to have to restart the whole process when you want to swing from horizontal to vertical aspect (although much less so if your camera is equipped with an RRS L-plate). Beware of the poorly executed collar on the original Canon 100mm/f2.8 lens (non-IS version): it’s much too close to the lens mount, and the lens plate on the foot will hit certain camera body grips when rotating from horizontal to vertical.
These shortcomings are all neatly solved by the 180-200mm “macro”. They offer double the working distance, tight acceptance angles for easy background control, superior balance & stability, and the convenience of a tripod collar. Love those 200mm macros!
Another advantage gained when using any 200mm focal length lens for closeups is the more evenly distributed lighting that the subject receives when using flash. The lens’s longer working distance mitigates inverse square law light fall-off. A strobe can be applied with more natural results and there’s less background light fall-off.
Macro Flash
In closeup work, flash will often be needed to permit the use of small (f/11-16) apertures to assure adequate depth-of-field at an acceptable exposure duration. Also-closeup subjects may require flash fill to reduce excessive contrast, to produce catchlights, or to enhance modeling.
It is seldom viable, when working close, to mount a strobe in the camera’s hot shoe. That position is too low, does not offer the needed 15-30 tilt for beam aiming, and is off-axis in vertical aspect. Add one of our flash brackets for more effective flash placement. More than one off-camera remote strobe may be necessary to lighten a dark background, or to provide rimlight, or backlight, on the subject; to accomplish this, add a second flash mount to your flash bracket.
RRS Macro Gear
Remember that as you focus a true macro lens, magnification changes. To maintain your desired magnification, you need to move the camera to obtain the correct focus point. This is an exercise in frustration without a macro focusing rail. The B150-B is our premium linear motion lead screw focusing stage and rail. The B150-B is designed to mate seamlessly with our quick-release system in as compact a package as possible. The bottom rail comprises a Really Right Stuff-compatible dovetail that mates with your ballhead clamp while the stage integrates our patented lever clamp that connects directly to your Really Right Stuff camera plate.
Camera to subject distance can be adjusted in minute increments for super-fine focus; lead screw delivers 1.25mm of travel per full revolution.
Rough positioning is done in one of two ways: either press the stage release lever and slide the stage on top of the rail or loosen the jaws of the ballhead clamp and slide the rail within the jaws of the clamp. This compound adjustment feature effectively doubles the total gross adjustment range. Turn the focus knob at the back or front of the rail for super-fine focusing. The entire assembly is compact and rock solid. You can purchase the dedicated body plate separately.
B150-B MACRO RAIL:
Really Right Stuff compatible dovetail extends along the bottom of the rail. Rail can also be mounted using ¼-20 tripod socket. Stage release lever allows positive lock & release of stage and integral lever-release clamp offers optimum quick release convenience with an ultra-low profile.
B150-B PACKAGE:
Includes Lens Mount and B2-FAB clamp. The LMT gives sufficient height clearance to allow even the tallest camera bodies to rotate freely without hitting the rail. The LMT is hollow and has two laser-engraved scales; allows precise lateral positioning.
B150-B ULTIMATE PACKAGE:
Includes two B150-B Macro Focusing Rails for greater control over fine positioning. Using two B150-B rails delivers geared motion both fore and aft as well as left to right. This package also offers the versatility of allowing the use of both camera plates and lens plates.
Macro Panos
We had quite a lot of feedback on the image that appears on page 62 of our 2010 catalog (if you don’t already have your copy, give us a call or download your own). So we decided it would make an excellent case study.
SHOOTING THE ANEMONE IMAGES FOR OUR 2010 CATALOG BY JOE JOHNSON, OWNER OF REALLY RIGHT STUFF
I made this image under a bit of time pressure for a “product in action” shot to introduce the macro photography gear section in our 2010 catalog. I thought a good macro-pano shot of some fascinating tide pool subject would be the perfect solution. On a Saturday afternoon at low tide, I took the family out to Cayucos, one of many neat little coastal towns nearby. We wandered about the tide pools, but the light and subject matter just didn’t cooperate and I ran out of sunlight. We had fun, but the photo results were uninspiring. Even though we needed to get the catalog shipped before Thanksgiving and I only had a couple more low tides before the deadline, I decided to give it another try.

On the following Monday I went to Palisades Bluff in Shell Beach (about 15 minutes south of our office in San Luis Obispo, California). The lowest low tide was around 5 pm and sunset was about 6 pm, giving me a 2-hour window to find my subject, setup, shoot the tide pool creature image (image at top of this page) and shoot the gear setup image (above). Luckily the tide pools were literally no more than 100 feet from the parking spot. I say luckily because I was shooting by myself and had to carry two complete sets of camera gear and tripods to get both shots. I scrambled about looking for subjects and found a number of anemones in pools of water shallow enough to let me get a good shot. I set up about 4 different shots; the one we chose was the last set-up which I shot just before the light was totally gone.
NOTES ABOUT THE GEAR SHOWN ABOVE
The photo gear shown in the image is crouched around the anemone like a robotic metal bird waiting to pounce. This surreal setting, plus the fact that the anemone is lit-up, is what makes the image intriguing to me. I used a circular polarizer on both cameras to cut the glare on the water surfaces. The polarizer also allowed a longer shutter speed, which helped me time firing the Camera A strobes pointing at the anemone at the same time the shutter was open on Camera B. I set Camera A to fire using the 10-second self-timer. I tripped the shutter on Camera A, counted 8 seconds, then tripped the shutter on Camera B. Because I was making an HDR image, I repeated the process two more times, bracketing the exposure on Camera B. The shutter speed on Camera B was slow enough that the image review on the back of Camera A also appeared in the capture, which I also think is kind of cool. Timing the strobes in this crude way was a bit hit or miss, so I had to repeat the whole process a few times. As luck would have it, it started drizzling before I finished, and you can see the misty water droplets on the photo gear. For me, this also adds to the image.
NOTES ABOUT SHOOTING THE ANEMONE
I didn’t use any of the images shot on Camera A as described above for the actual macro-pano stitched image of the anemone (Image 2); they were taken purely to light up the anemone for Image 1. For Image 2, I used the gear set-up exactly as shown in Image 1 with one exception. I was shooting at a 1:1 image size using the full-frame image sensor on the Canon 5D Mark II. To get as much of the anemone as possible in the image from the top of the frame to the bottom, I oriented the camera in vertical aspect. You can see in Image 1 that the film plane on Camera A is parallel to the face of the anemone. This helps keep as much of the anemone in focus as possible as you shift the camera laterally across the subject. I set the lens to 1:1 focus distance, then used the bottom B150-B focusing rail to actually focus the image. Because I was shooting at 1:1 and the image sensor is 24mm x 36mm, I knew I could shift laterally 10 mm between shots and still have 20% overlap. To the naked eye, the anemone tentacles are barely moving, but when you stitch 5 separate images together, those small movements make trouble. Therefore, it is best to shoot the sequence as fast as possible. I did not lock the top B150-B down between each shot and did not use the fine focus knobs to move the camera gear laterally. Rather, I just let the weight of the gear hold itself against a loosely tightened stage lock and then depressed the gross positioning button and shifted 10mm between each shot by sliding the stage and then releasing the gross positioning button. The five images were stitched together using Photoshop.
Focus Stacking
When shooting macro photography, it is often nice to get the entire subject in focus but leave the rest of the image with a beautifully out-of-focus bokeh. This is where “focus stacking” helps. Focus stacking involves shooting a series of images while methodically changing the focus point from the front to the back of your subject. The most accurate way to do this is to use a macro focusing rail, such as our B150-B.

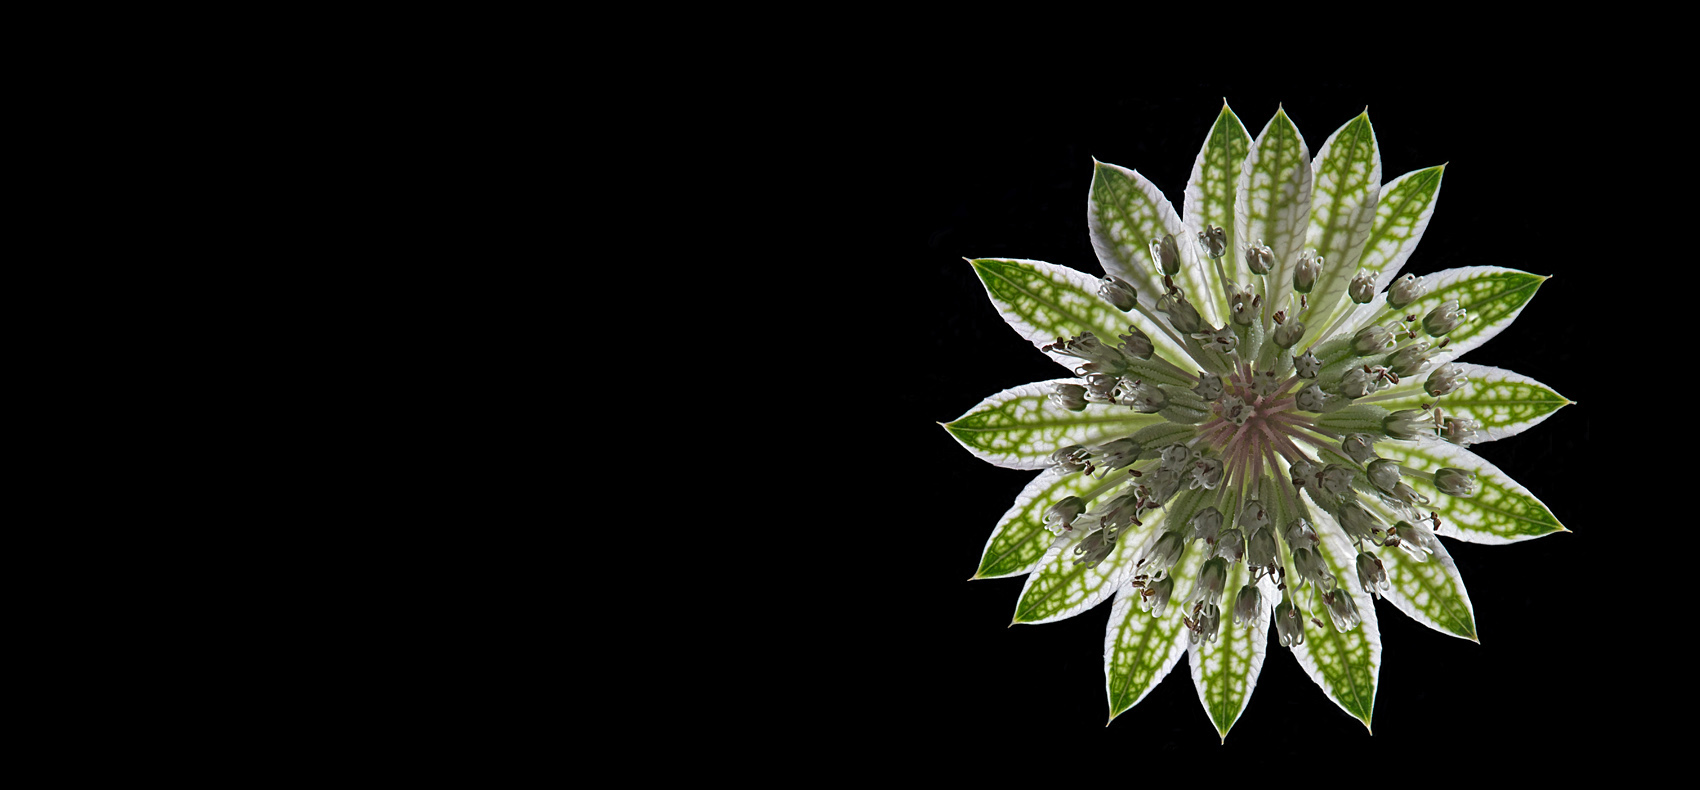
The picture (right) was compiled from 6 focus-stacked images. The distance from the flower to the film plane was .5 meters (~ 20 inches), giving a reproduction ratio of 1:1.2 using the 180mm macro lens. From the front edge of the flower to the back edge was about 18mm (~ 3/4″), and using the B150-B the camera/lens was shifted 3mm (~ 1/8″) closer to the flower between each shot (about 2½ rotations of the B150-B lead screw). The ideal number of images and the amount of shift between each image depends on the aperture selected, the focal length of the lens being used, and the camera-to-subject distance. Practice will help you find the right combination. Set the camera’s exposure mode to Manual, turn off Auto White Balance (the sunny or cloudy settings are usually fine), and set focus to Manual.
A handy tip that helps in post processing is to take a throw-away image with your finger in the picture to mark the beginning of your sequence of shots and then again after your last shot. After you have your series of images, it is time to process them. We like using Adobe Lightroom and Photoshop. It is better to save post processing until after all your images are merged. There are several different methods to create a “focus stacked” image, but this process is one we found that provides the most control and is simple to follow.
Focus Stacking Setup

- Import your photos into Lightroom (if you don’t use Lightroom, you can use Adobe Bridge).
- Select your images, Command-click (or right click) on one of the highlighted images, float the mouse over the “Stacking” option, then click “Group into Stack”. All the images will then be grouped visually behind one image.
- Command-click (right click) on the selected stacked images and then float the mouse over the “Edit In” option and click “Open as Layers In Photoshop…
- After the images have all loaded, select all the layers in the layer panel and click Edit then “Auto-Align Layers…. Use the Auto option in the Projection box and click “OK”. Depending on the file size this may take a while to render. It’s a good idea to save your image as a new Photoshop File Document, preserving your original images.

- After the layers have all been aligned, select all the layers again, click Edit, then “Auto-Blend Layers…. Select “Stack Images”, make sure the “Seamless Tones and Colors” option is checked and click “OK. Again this process may take a while depending on the number of layers and your file sizes. Save again.
- Inspect your blended layers. Look for areas in your image that aren’t in focus but should be.
- Starting with the layer that is lowest in the layer panel, Alt-click the eye (show/hide layer) icon to isolate that layer. Selecting the layer mask and use the Paint Brush to paint white to add the part of the image that is in focus or black to remove part of the layer that is out of focus and is covering an in focus sub-layer. Perform the same actions wtih all subsequent layers. Only edit the layer mask and not the image layer.
- To reduce file size, flatten image and then apply other post-processing as desired.
Handheld Macros
Adding a flash bracket with variable extension capability to Canon’s MT-24EX macro twin light flash or Nikon’s wireless SB-R200 system gives the photographer significantly greater control than relying on the plastic filter ring flash mounts that come with the units. With the factory mount, you can place the flashes at various positions around the front of the lens, but are limited to that plane only; i.e. you have no ability to change the fore-aft position of the flash. Another drawback with the factory mount is that you are adding significant weight to the front of the lens, increasing strain and hindering operation of zoom/focus on some lenses. A rig like our B-Series flash bracket with multiple flash mounts solves those problems.
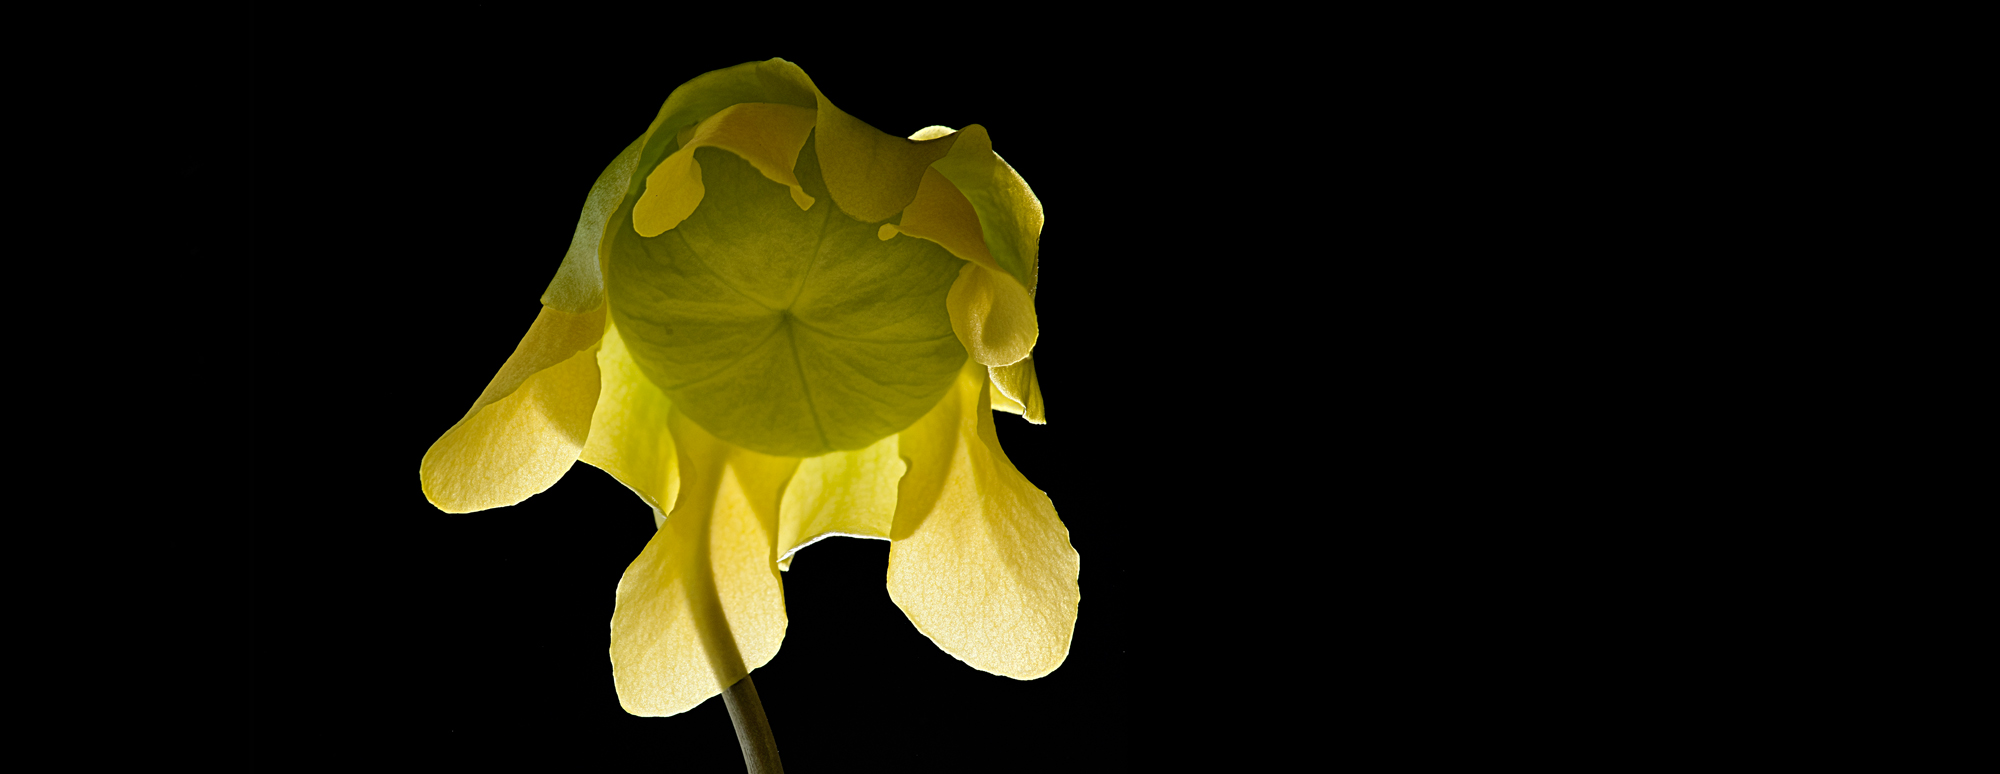
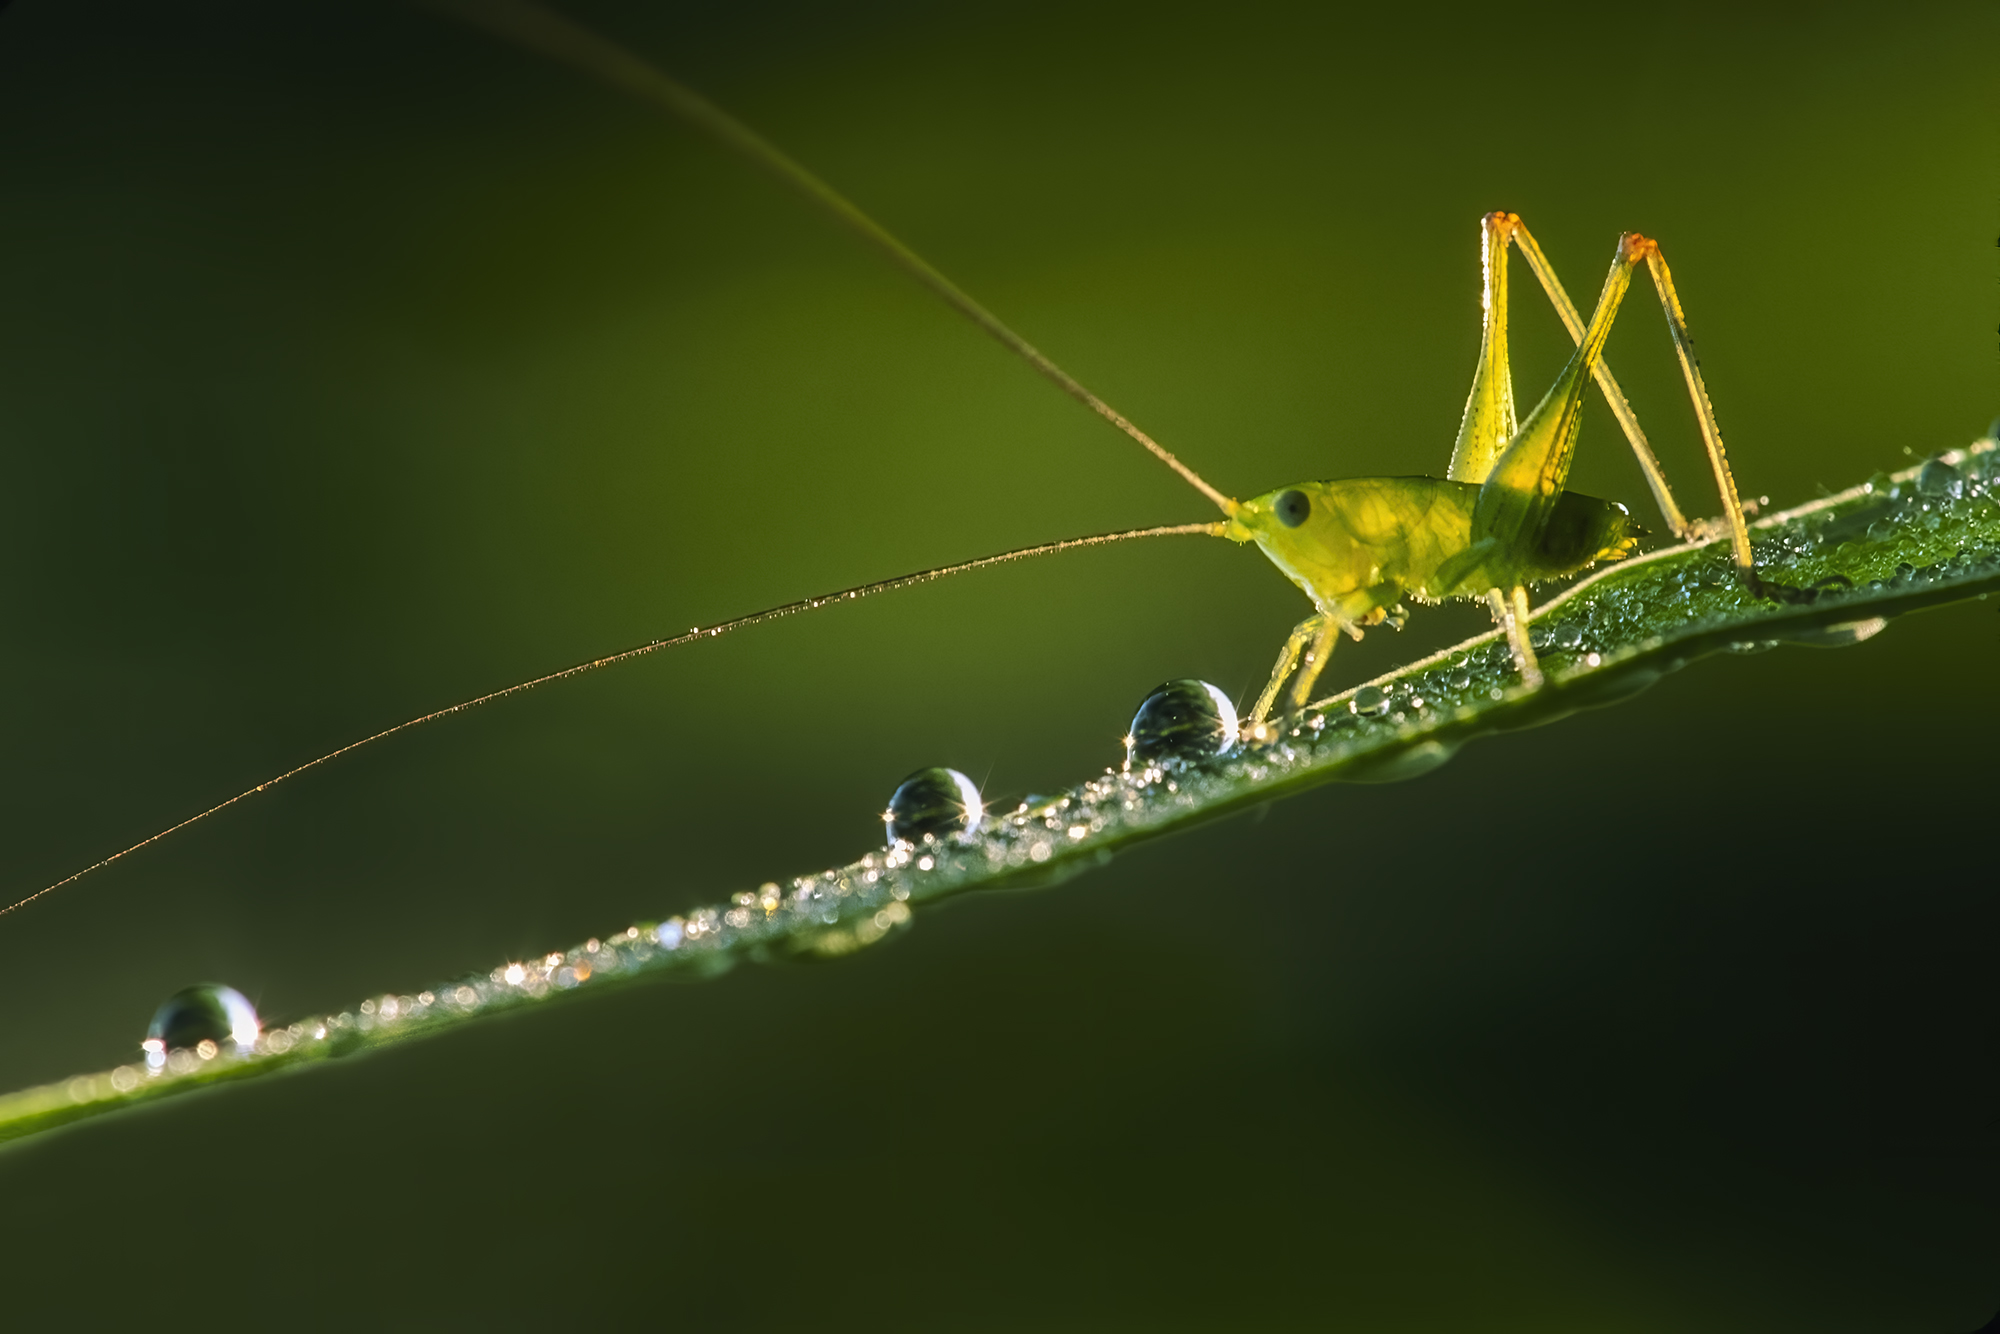
The flash duration of these macro flashes is relatively short (e.g., 1/1600 second on Nikon’s R200), so when the flash is the main source of light, you can actually hand-hold the rig with great results. This is perfect for moving subjects like insects or flowers waving in the wind. The images on these pages were shot hand-held on a typical late afternoon near Pismo Beach with coastal breezes providing plenty of challenge to the macro flower shooter. For the inset photo (lower right), I actually focused on the stamens of the clover flower and used the flower petals to diffuse the back-light of the strobe positioned overhead and behind it. I front-lit the flower with the other flash.
The two poppy shots demonstrate the effect of using one of the strobes to light the background. Although nice for studio shots, I’m not crazy about black backgrounds for shots of flowers in nature. If I’m going to hike about looking for the perfect flower in the wild, then I prefer to have at least some hint of the environment whenever possible. I achieve this by extending one of the strobes past the flower and directing the light against the material behind the poppy. The other strobe was slightly off to the side.