Tripod Maintenance:
Cleaning Tripod Legs
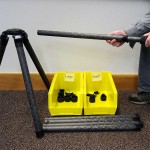
Tripod
Containers (2-3)
Running Water
Towel
*Waterproof Grease
We’ve also put together a series of videos on the various maintenance procedures for our Versa Tripods.
- 1
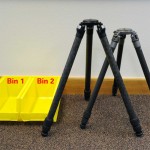
Unscrew the top twist lock. If you have a tripod with 3 leg-sections per leg, set up 2 bins/boxes for parts. Set up 3 bins if your tripod has 4 leg-sections per leg. These bins will allow you to keep the different sized tube connections separate.
- 2
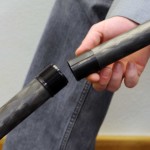
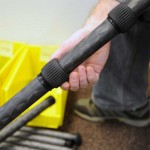
When top twist lock is completely unscrewed, pull the lower leg fully out from the top leg section. Place the two plastic pieces and the twist lock in one container.
Gitzo — The internal plastic pieces on a Gitzo tripod are white. Before dropping these parts in the bin, inspect them for wear. Exampled below is a potential point of failure. If your anti-twist sleeve has failed (cracked or broken), contact our Customer Service team.
- 3
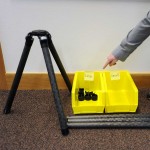
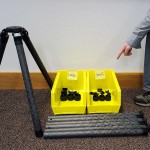
Repeat the above steps until all of the lower legs have been removed. Keep all the plastic pieces and twist locks from the top tube in one container. We’ve marked our containers “Large” and “Small” to make sure we don’t mix up the sizes. Continue removing all leg sections into their separated bins. Remember, if your tripod has 4 leg-sections per leg, you’ll need to use 3 bins.
- 4
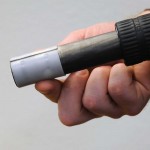
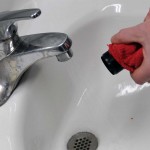
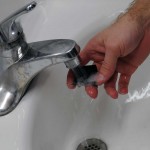
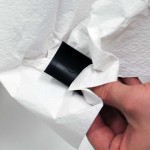
Rinse the threaded end of each tube under gently running water. Rinse the entire tube if you’ve been in any salt water. You may have to use a soft toothbrush to help clear fine grit out of the threads. Rinse the plastic pieces and twist locks under gently running water. Inside each twist lock, rotate the internal plastic sleeve under the running water to rinse out any trapped grit. Continue rotating the internal plastic sleeve until it rotates smoothly and you can’t feel any grittiness. Then dry each piece thoroughly, including the legs.
- 5
Now it’s time to put your tripod back together.
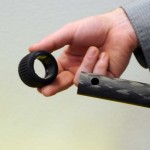
Start with the largest leg sections first. First replace the twist lock on the carbon fiber leg section. Orientation matters! The threads on the inside of the twist lock should go onto the carbon fiber leg first. - 6
Slide the twist lock partway down the leg section and pull two plastic pieces from the bin marked “Large.” Look on the inside of each plastic piece; there is a raised round area on the inside that will drop into the hole on the end of the leg section.
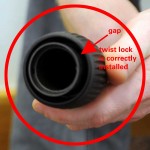
RRS Tripods — Orientation does not matter with the plastic pieces. As long as the raised round area drops into the hole they are installed correctly. There will be an obvious gap between the two plastic pieces.
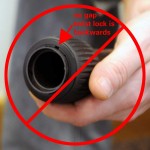
Gitzo — Orientation of the plastic pieces DOES matter in a Gitzo tripod. Be sure you properly align the plastic pieces so that they are NOT offset as shown in this image.
- 7
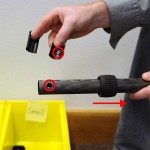
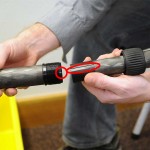
Now grab the top leg section that is still attached to the apex of the tripod. At the end of this tube you will see a very small white arrow. Line up the gap between the plastic pieces from Step 6 with this arrow and insert the leg section. Before securing, make sure the threaded white arrow of the attached section lines up to the white arrow you are attaching too. If not, rotate until both arrows are approximately lined up.
- 8
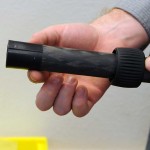
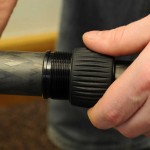
Push the twist lock up and thread it onto the upper leg section. Apply a very small amount of lubricant on the threads to lubricate the twist locks. We suggest Phil Waterproof Grease. Beware that lubricant can also attract dirt and grit, so don’t overdo it.
Continue with all of the remaining leg sections. Look over the entire tripod and make sure everything is in its place, that you don’t have any leftover pieces, and that the twist locks are all working. You’re done!


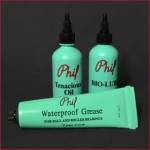
*We recommend Phil Wood Waterproof Grease for your twist locks. Add one or two drops of this thick oil to the threads, then rotate the twist locks back and forth to evenly distribute. Waterproof Grease is the best lubricant we’ve found for this application. Also, we like the fact that all Phil Wood products are made in the USA – they are completely designed, manufactured and assembled in San Jose, California.