Firstly, why do I shoot in panoramic format? I feel it is one of the most pleasing visual formats for our senses. It is how we see the world with our natural eyes. Ned Kelly even had a panoramic viewfinder built into his famous bullet-proof helmet!
Shooting Panoramic Photographs

The first problem is that most cameras do not shoot in panoramic format in a single image. Most cameras have either the 3:2 or 4:3 aspect ratio sensors. Yes, many cameras have in-built stitching programs that allow you to do stitches in camera. However, these files are not large, and they are generally only in a JPG format. It is difficult at present to find enough processing power in a camera to do large. Panoramic files created in camera or on your phone will not give you the quality you need if you want to produce big prints, or if you want mind blowing detail.
Single Shot Panoramic Photos
If the image file sizes are large enough (as with the Lumix S1R which can produce files up to 47MB – or with pixel shift up to 183MB), you can crop a single image, but you will be losing a lot of the pixels.
For example, on a 3:2 aspect ratio sensor, with a 47MB file cropped for a 3:1 ratio panorama, you end up using only 23.5MB of the sensor. This would give you a file of about 80-130MB and a print file about 80cm wide at 300dpi. Or, on a 183MB (pixel shift) file cropped for a 3:1 ratio panorama, you end up using only 91.5MB of the sensor. This would give you a file of about 500MB and a print file of about 140 cm wide at 300dpi. Both are reasonable print sizes, but if you want bigger – and mega detail – stitching is the way go.
Stitching is achieved when you take multiple images of a scene and then stitch them together in post-production programs like PhotoShop. I love stitching and these days many of my big panoramic images are made with this technique using my S1R Lumix.
Things to do when stitching

Camera settings
When you are shooting to stitch a panoramic image, you should not shoot on automatic camera settings as the variations in exposure, colour balance, and focus can make stitching impossible. Set your camera and lens up manually. Manually set the focus, aperture, speed, and ISO, and set white balance for the conditions. If you are shooting in RAW format, you can have colour balance on auto as you can change the colour balance of all images in post-production). It is best to shoot in RAW format, as this will give you better post-production choices. Do not change your camera or lens settings throughout a stitch.
Find what you consider to be the best part of the scene you are shooting. Get your camera settings right on that section of the image. Shoot all the images for your stitch, then check the histogram, and focus on all your files. This will show you whether you have the dynamic range to cover all highlights and shadows. Also check focus for depth of field and sharpness. If necessary, adjust your exposure or focus setting accordingly.
It is best to shoot in the vertical format as this will give you more height in your image.
When stitching it is important to stitch on the Nodal point of the lens you have attached to your camera. Google’ How to find Nodal points of lenses’.
What is a Nodal Point?
The Nodal Point of a lens (or, more correctly, the entrance pupil) can be considered as the point at which the light rays entering the lens converge. It can also be considered as the centre of perspective of the lens or the apparent pupil. This point can be considered as the Front Nodal Point as the lens also has a Rear Nodal Point and, in a simple lens, the two nodes converge to a single point.
The wider the lens, the more important it is to rotate on the nodal point of the lens as there is so much more perspective variation in the foreground with wide lenses. The wider the lens, the more overlap you will need between images. About 30-40% overlap should be good. It is better to over-shoot than under-shoot, so you allow the stitching program more information it will need to compensate for the perspective variations.
With telephoto lenses it is not as important to rotate exactly on the nodal point because perspective variation is minimal, as everything is in the distance. However, I try and shoot on the nodal point, even with my long lenses.
Rotate your camera on the nodal point of your lens, not the base plate of your camera.
If you do not have a stitching head and a good tripod, a simple way is to hold a thumb up on one hand. Then rotate your camera on your thumb about half-way along the barrel of the lens (be careful not to change focus on your lens). This will give you a better chance for a wide-angle stitch. Be sure to keep your camera level on a horizontal reference point.

Another way is to imagine the point half-way along the barrel of your lens as a point in space. Then rotate around that point by moving your body. If you are doing hand-held stitches, use the horizon line to keep them level. You can also use the level you can set in your viewfinder on most cameras.
Stitch images from left to right so they will appear in the correct order when you view them in a post processing stitching program. Some people stick fingers in front of their lenses to indicate the beginning and the end of stitches. If you shoot in the order I suggest, when you view the images later, it will be obvious where the stitch starts and finishes.
If you are doing multiple (vertical) rows of stitching, shoot from left to right then on the next row go back to your start point and shoot left to right again. This makes the intervals between shots equal to help deal with things like cloud movement.
Stitching Heads

Stitching heads can make the process of stitching images so much quicker and easier. They also give you better files for easier post-production stitching.
With a stitching head you can accurately create the individual images shot on the exact nodal point of each lens you are using. To learn how to find the nodal point of each lens, just Google ‘How to set Lens Nodal points on stitching heads’.
You can also set degrees of shift for your individual images. Knowing the degrees and the focal length of the lens allows some programs to know more about where the joins should be. PTGui is one of the programs that uses the added information to do stitches PhotoShop cannot do.
Stitching heads need to be used on a good tripod as they must be levelled before stitching.
There are two main types of stitching heads for shooting panoramas:

A Single Row Stitching Head is generally used for creating single row panoramas. This is a good way to get started. The downside is, when you level this stitching head on your tripod to shoot the images, the horizon is always in the middle. Creatively this can be a little boring.
If you have a ‘Perspective Correction’ lens you could move the horizon line up and down according to the amount of acceptable movement in your lens. If you don’t have a PC Lens then you could over shoot the scene to give you more room to move the horizon line up or down by cropping. You can also adjust the level for each image on your tripod to position the horizon line wherever you want it.
You can also do more rows in your stitch but again you will need to make manual adjustments, which is doable, but not ideal.
A Multi Row Stitching Head I believe is the one you need if youare really into stitching. If you already have a single row stitching head you are half-way there. For most brands, you just need to buy some accessories so you can shoot as many rows as you want, or position the horizon line wherever you want it. With a Multi Row Stitching Head you can shoot up to 360 degrees. The sky is not the limit, as you can shoot that as well if you so desire.
Composition and shooting tips for Panoramas
- Consider the starting point and finishing point for your panorama. Leave extra space at sides, top and bottom for cropping later, as when stitches are processed they often will have jagged edges.
- Work quickly when you’re shooting in changing weather, so you capture every image in the same lighting conditions.
- Check your focus and make sure you have enough depth of field in your images. It is usually best to have a good depth of field, so set your lens aperture on
about f8 to ff11.
- Choose the right lens for the amount of compression you want in the image. Remember, wide lenses bring the foreground forward and push the background back – and vice versa for longer lenses. Your choice of lens can make a big compositional difference.
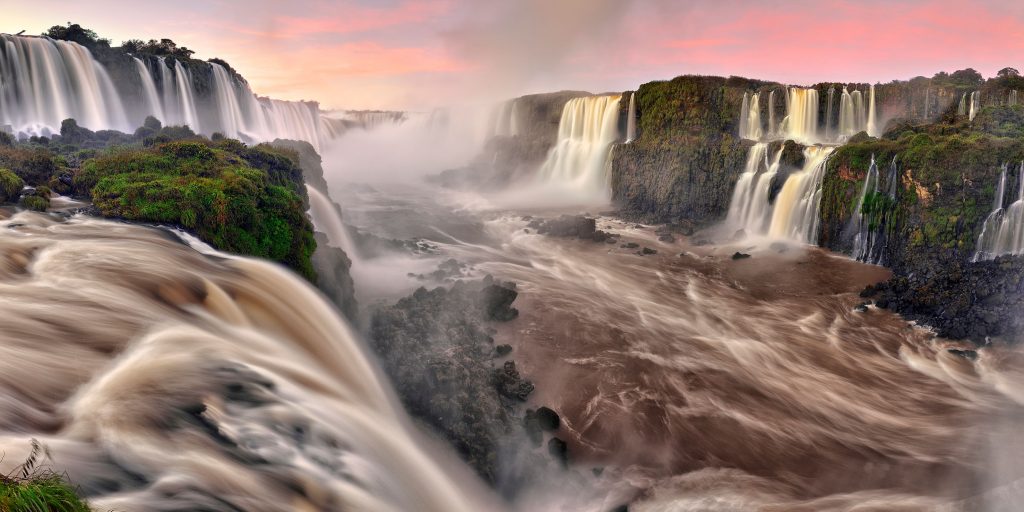
- When shooting moving water, try to slow your exposure down so it smooths the movement to make stitching possible. ND filters are good for this, but make sure you use good filters. Your filters need to have even density and no colour casts. Do not use variable ND filters as they will cause stitching problems in clear areas.
- With moving water (as in waves), look for patterns where the waves are breaking and shoot at similar times so the waves will stitch cleanly.
- If objects are in the distance the files are easier to stitch. You can even do stitches from helicopters or balloons, but you must shoot them quickly, so you don’t get too much movement. Obviously, stitches shot from the air need to be hand-held.
- Avoid using polarizing filters. Depending on the angle they are facing to the light, they can affect each file of your planned stitch differently.
- One disadvantage with stitching is when there is excessive movement in the scene, or you are trying to capture a decisive moment of action or light. This is where you will need single shot captures.
In Summary
Stitching is a very creative tool and will allow you to get really wide panoramic views. so you can produce amazing prints.
Remember, the quality of the individual files you take will determine the quality of the final stitched image.
If you don’t have the post-production skills – or the time or inclination – to do the necessary post-production, you can always get a lab to do it for you. Stitching is not hard if the original files are shot correctly.
So, as the old saying goes “A stitch in time can save nine”. Although in reality, with stitching it may take 9 or more to get one panoramic masterpiece.
Good luck and …
Enjoy the Journey!