A Tripod Addict’s Guide
To Beach and Ocean Photography
Let’s start with one unequivocal fact about me: I love my tripod. Next to my camera body and lenses, my tripod is the most critical piece of gear that I carry and it is never a burden to bring. Rather, it’s a wonderful opportunity because with it, I can explore the depths of my creativity and push the camera’s capabilities with the confidence that it will stay in place for as long as I need it to.
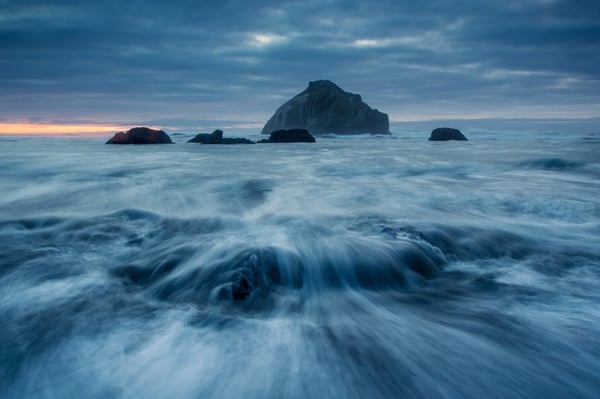
Photo by Brian Matiash
I’ve been a loyal and devoted Really Right Stuff owner since 2009 and am on my third tripod of their support systems. In fact, I remember working closely with Mark G to get one of the very first TVC-23 sticks off the line so that I could use it on an HDR Photowalk that I held at Photoshop World Las Vegas that year. In the four or so years that I’ve been exclusively using Really Right Stuff tripod systems, I’ve come to master them and know exactly what they’re capable of. I know how well they will balance and how far I could push them. My tripod is, in every sense, an extension of my camera.
During the years, I’ve put my tripods to work in a multitude of environments, elements and conditions. And in that time, I’ve developed some tips and tricks to help you get the most out of your RRS system.
On Location
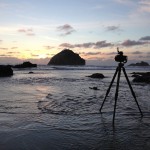
One of my favorite places to use my tripod is on the beach. There is nothing quite like capturing the awesome power of the ocean and its effect on sand. To convey the grandeur of the ocean, it’s important to bring your camera to the right height so that you can fill the frame with the beach and water while also keeping enough of the horizon so that the viewer can perceive depth. Your vertical perspective is an important factor to keep in mind. If you go too low, you risk losing your ability to convey depth. In these cases, experimentation is key. I’ve found that by extending only one section of my RRS TVC-34L sticks, I can get high enough to capture the beautiful foreground pattern of the tide as it rushes in and out while also capturing the horizon off in the distance.
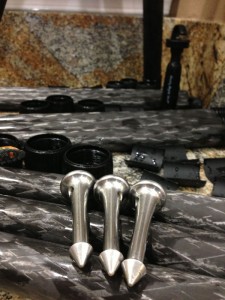
RRS spiked tripod feet.
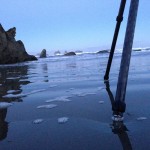
In addition to the height of my tripod, I also cannot stress enough the importance of using proper feet. Whenever I’m shooting on sand, mud or any other malleable surface, I always attach my spike feet. These spikes make it effortless to burrow the tripod legs into the surface to get a better grip.

Tripod withstanding the tide.
As you can see, I have absolutely no worry about leaving my camera out in the distance as the tide comes in and rushes out. The reason why it’s important to ensure that your tripod finds purchase in the sand, especially if you’re close to the water, is because when the ocean pushes and pulls sand around the feet, your tripod can actually and move in the smallest amounts. Even so, the most minuscule motion can be enough to ruin a good long exposure. So be sure to push your tripod legs down until they feel sturdy.
As for optimal exposure settings, I’ve found that getting my shutter speed to approximately 1/2 second (by adjusting the Aperture and ISO accordingly) gives me the best results to capture the motion of the water while still retaining some definition. If there is an abundance of natural light, I usually go straight for my 3-stop ND filter. While I know a lot of people who go straight for their 10-stop ND filters, I find that the extended shutter time it requires tends to lead to an overall loss in the form of the wave, leaving you with a ghostly, ethereal look. While there is absolutely nothing wrong with that, I tend to prefer retaining some form as it helps convey the direction and motion of the water as it approaches and leaves the frame of the camera. I also use a Circular Polarizer just about every time I am out shooting nature to help reduce glare on the surface of the water and to bring out that really nice punchy contrast in the sky.
Pay attention to the way the water is moving around you.
Timing for when you fire off your exposure is also important to get the visually pleasing results. By adopting a practice of paying attention to the way the water is moving around you, it will make anticipating how to compose your frame much easier. I’ve found that by firing off the exposure just as the crest of the water begins to break the top of the camera frame, I can achieve a pleasing result. I also don’t stop rifling off frames until the ocean water has fully return back out. Also, it’s really great if you can position yourself near a rock or an area with lots of waves. When the waves break and whitecaps form, they can translate really nicely with a long exposure.
A Little Maintenance
Goes a Long Way
Sandy tripod legs.
Once you’re done with your shoot on the beach, you may find out one more little surprise: it’s very messy on your gear. Between the salty ocean air, to the mist flying around, to the sand that gets kicked up everywhere, this environment can be very menacing on your gear IF you don’t take care of it. While it’s not always practical, I do recommend minimizing the amount of times you change lenses on the beach. It’s ridiculously easy to get junk on your sensor during this seemingly quick and harmless process. If you’re not comfortable with cleaning your own sensor, just have your local photo shop do it or send it in to your manufacturer. I am a platinum Canon CPS member and I take advantage of that cost for this membership by sending my camera and primary lenses in for some TLC every 2-3 months.
Cleaning my tripod.
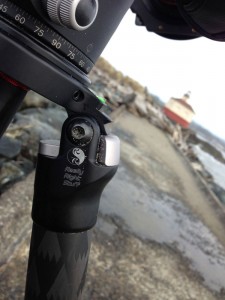
As for your tripod, well… if you’ve never cleaned your tripod before, you may be in for a shock when you see just how much sand can accumulate on the inside shafts. Keeping a clean tripod is just as important as a clean camera. Sand can get in between the threads of the grip locks, making it harder to achieve a solid lock and prevent the tripod legs from easily retracting. RRS has posted a very easy-to-follow set of instructions that walks you through how to disassemble your tripod system so that you can thoroughly clean it. After one or two attempts, you’ll be able to disassemble, clean, and reassemble your tripod with your eyes closed. One of my recommendations is to buy a standard toothbrush and use it to remove the finer grains of sand that get stuck in threads even after giving them a good rinse.
I hope you’ve been able to take away some pointers and tips for getting the most of your RRS tripod on the beach. Tune in to the next post to learn how to maximize your tripod performance in another environment.
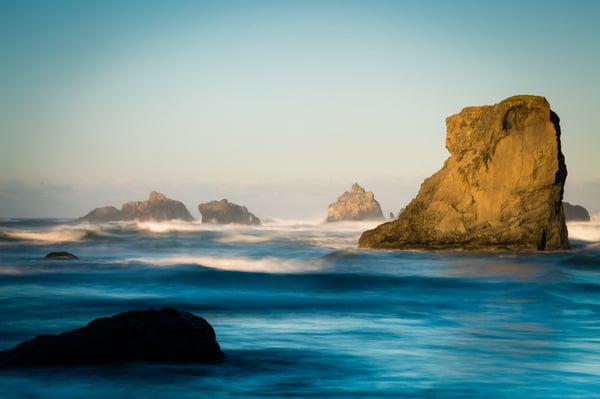
Photo by Brian Matiash
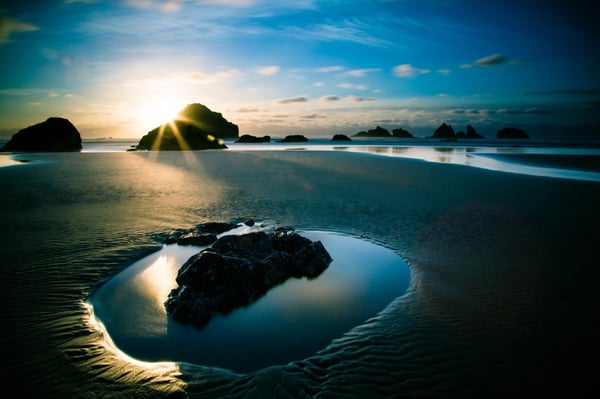
Photo by Brian Matiash
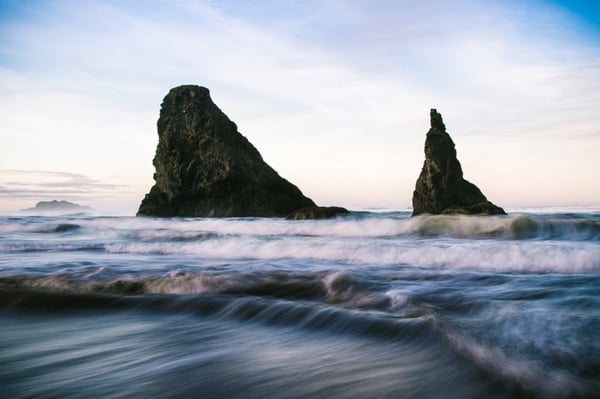
Photo by Brian Matiash

Photo by Brian Matiash

Photo by Brian Matiash