The Mood Matters Most
It’s great to be posting here again on the Really Right Stuff blog. I think you will find this post – and my future posts – fun and informative . . . because I like to make learning fun.
The idea in this series is to show you what I call the “evolution of an image,” going from idea to image. I’ll show you my before and after shots and include photo processing info too.
Location: Coquille River Light, Oregon Coast
Goal: Create a black-and-white image that captures the dramatic mood
of the scene, created by the details in the overcast sky and the movement of the water.
Thought process: Upon arriving on site, I knew that black-and-white was the only way to go. Why? Because black-and-white images of low-contrast scenes can have more impact than color images, especially when the contrast is boosted, and I was looking for an image with impact.
What’s more, I noticed the beautiful ebb and flow of the waves as they caressed the rocks that lined the shore. I wanted to capture that movement by using a slow shutter speed.
Finally, I envisioned an image with great depth, depth created by the rocks in the foreground leading to the lighthouse – an image with not only a great sense of depth, but with great depth-of-field (everything in focus).

Behind-the-scenes story
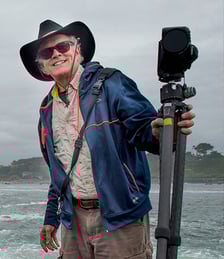
My friend Alex Morley took this photograph (right) of me after I finished photographing the lighthouse (left). As you can see, I am wearing rubber boots. Those rubber boots let me get into the exact right position and to make my picture while keeping my feet dry.
You’ll also notice that some of the rocks are covered with water and algae, a combination of elements that makes rocks very, very slippery. When walking on slippery rocks, be extra careful. Move slowly. A slight slip and you and your camera may wind up in the drink.
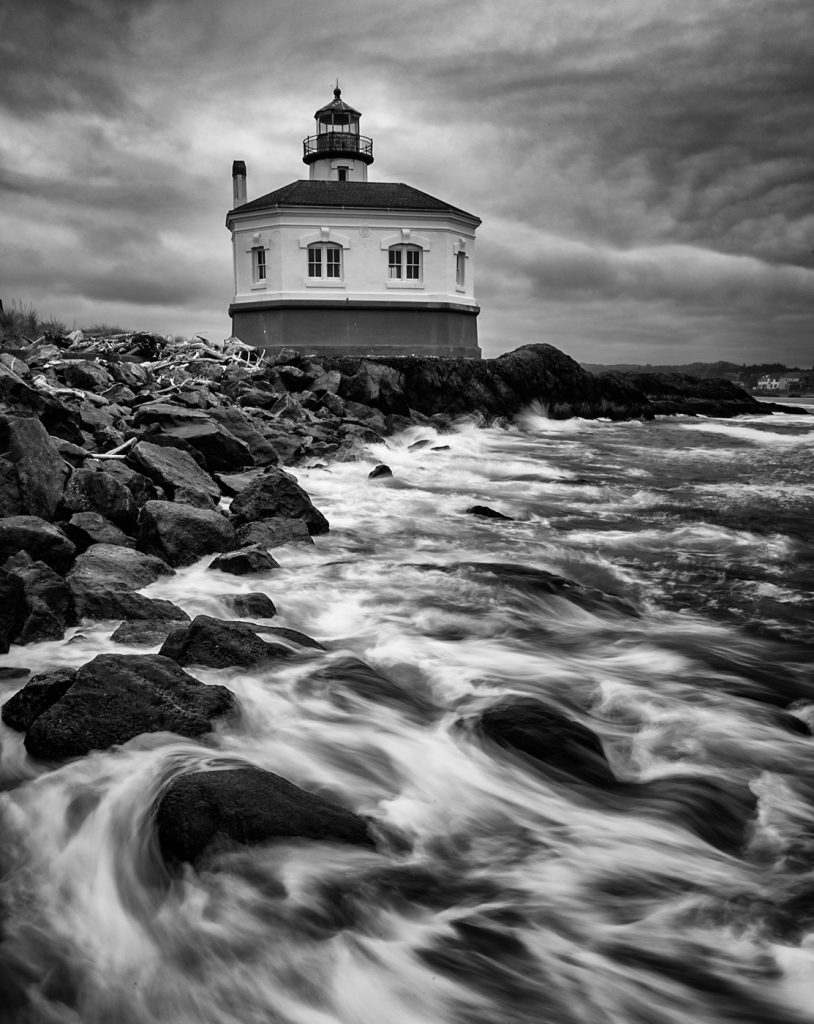
My Favorite Shot
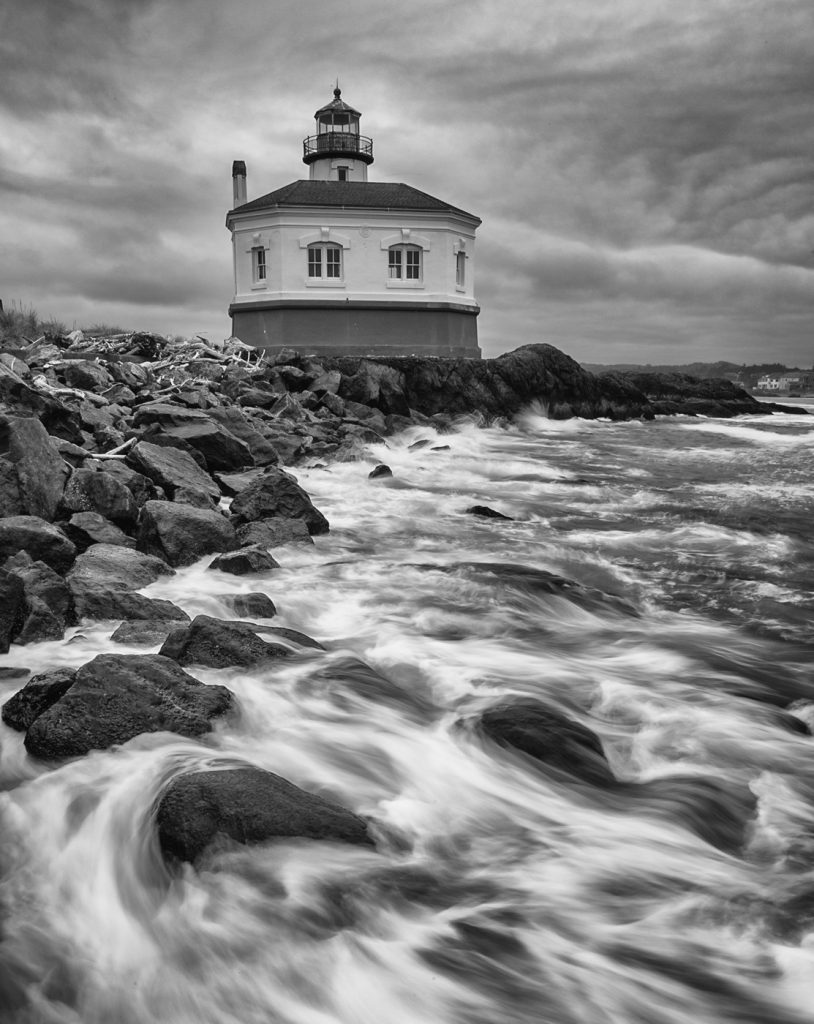
The image that opens this example shows the blurred water (silky effect) receding back into the sea as it flows over and around the rocks in the foreground. Careful cropping, which placed large rocks with flowing water in the very near foreground, gives the feeling that he or she is standing in the scene.
Basic Flowing-Water Photography Tips
To get the flowing-water/silky water effect, you’ll need a neutral density) ND filter, and you’ll need to vary your shutter speed to get exactly the desired effect. That could be from ¼ of a second to several seconds.
Two more important tips: Always shoot with your camera’s highlight alert activated so you can see if any of the bright parts of your scene are overexposed. If they are, reduce your exposure. Always shoot with your histogram activated. Your histogram is your in-camera light meter. Make sure you don’t have a spike on the right. If you do, reduce your exposure.
When setting up a tripod on rocks, never take your hand off the tripod because a wave could knock it over. Also, double check to make sure that all the legs of the tripod locked securely into place. Then check again.
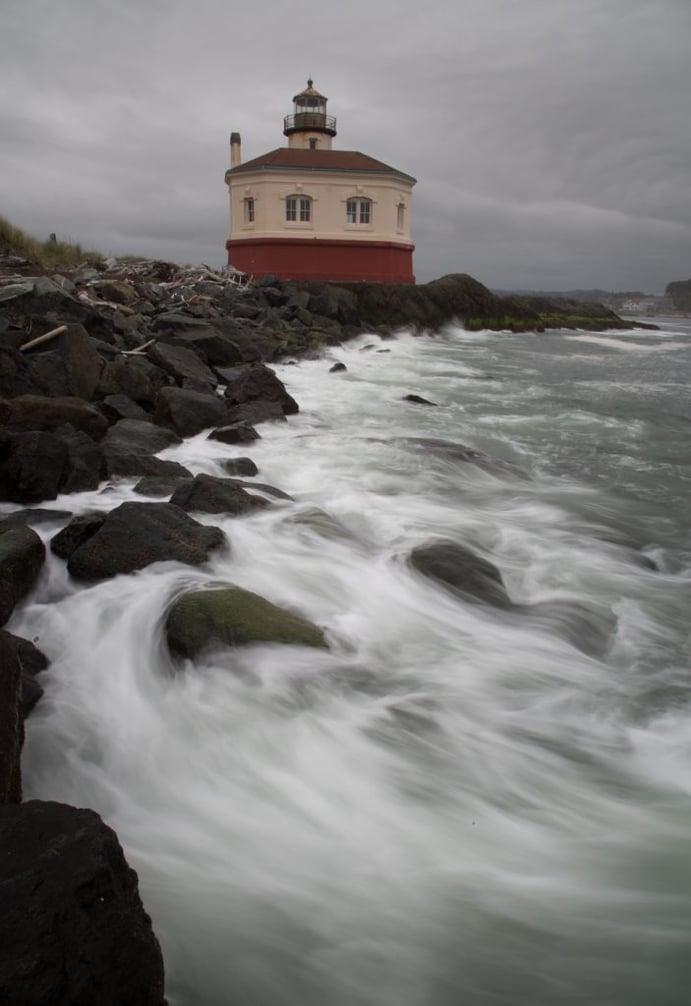
Image Processing Technique
Here again is my original raw file from which I created the opening image. It was underexposed (technically, according to the camera’s EV display) to preserve details in the white water.
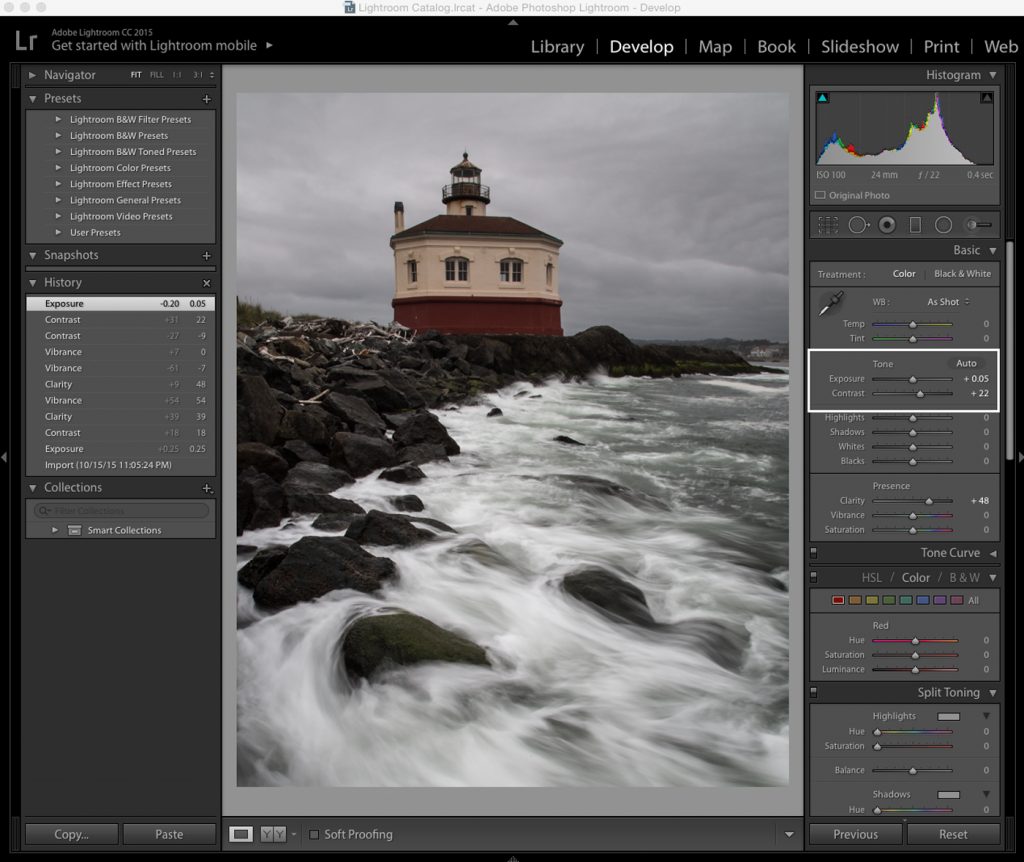
If you want a good black-and-image you need to start with a good color image. In Lightroom, I only boosted the Exposure and Contrast.
When I know I will be using a plug-in (as I did in this case), I don’t make too many adjustments in Lightroom. That’s because I know I will be back in Lightroom after applying the plug-in where I can add additional adjustments and enhancements, which might be as simple as a together crop.
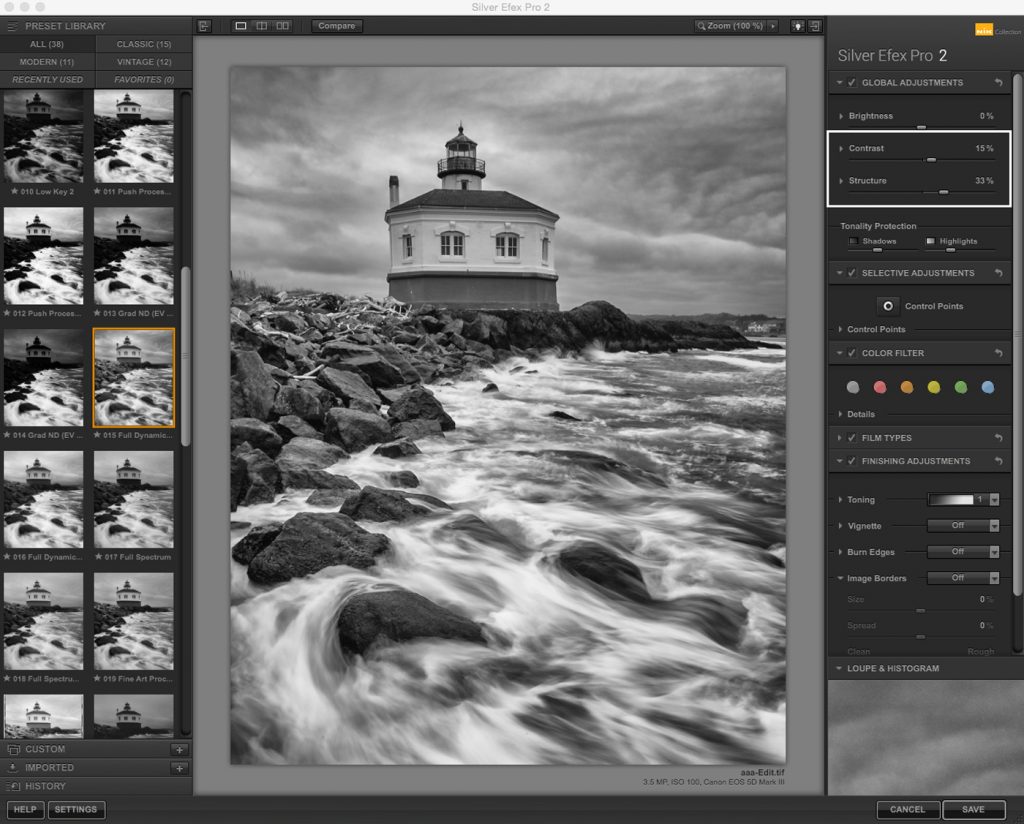
After experimenting with different presets in Nik Silver Efex Pro, I felt as though Full Dynamic Range, with a small boost in Contrast and Structure, produced a strong black-and-white image. Comparing this image the color shot, I thought this shot rocked . . . but I felt as though it needed something more. More impact.
Here is the result of my Lightroom adjustments combined with the Full Dynamic Range filter in Nik Silver Efex Pro.
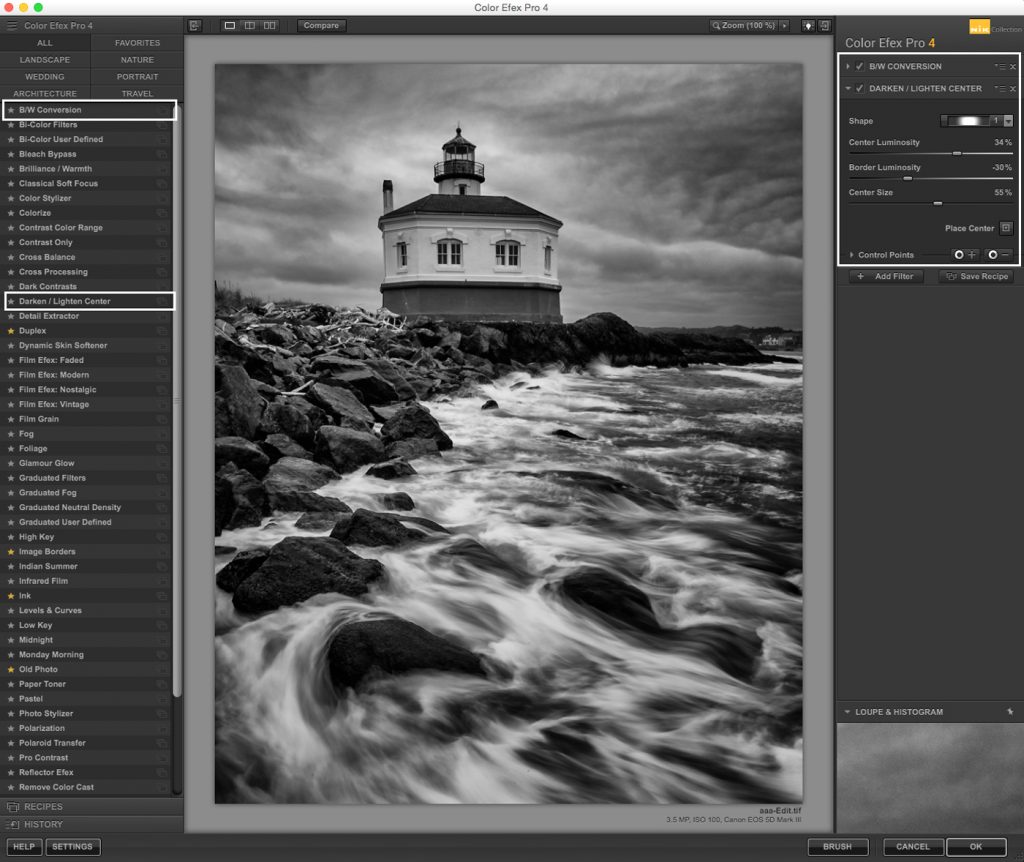
Simple and basic enhancements and adjustments can add to the impact of an image. Here I wanted to darken the edges of the frame, much like painters darken the edges of the canvass to draw more attention to the main subject.
When I moved my image to Nik Color Efex Pro, the BW Conversion was automatically selected. That’s because in Color Efex Pro the filter you used last automatically comes up first. I liked the effect, so I kept it.
Then I added a filter (by clicking on the Add Filter button) and selected Darken Lighten Center. When this filter is selected, you choose where to place the center point in the frame (just under the lighthouse in this case), and then you choose the size and shape of that point. Next comes the real fun: you control, with the Center Luminosity and Border Luminosity sliders, the brightness inside and outside of the point.
After making my adjustments, I clicked OK. The opening image in this example is the result of that complete process.
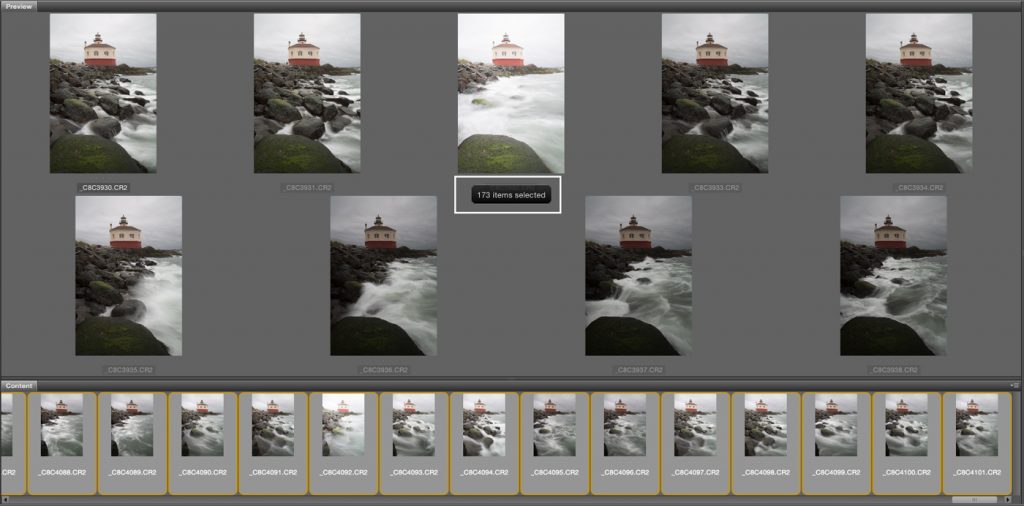
Outtakes
I have 172 outtakes from this photo session. One, only one, captured the waves in the exact manner in which, to me, they conveyed the mood and feeling of the image. Why so many shots? I experimented with many different slow shutter speeds, from a few seconds to 1/30th of a second. I kept checking my camera’s LCD display to see if I liked the image – keeping in mind that everything looks good on a small screen.
So when you are in a similar situation, my advice is to experiment to your heart’s content with different slow shutter speeds. Know that, you will probably want to pack some extra memory cards in your pocket, which brings up another tip.
Closing Thought
I don’t usually take a large number of pictures to get the one shot I want. In this case, however, I knew that was necessary to capture the exact moment in time – the perfect silky water effect – for which I was looking.
When you are out photographing and when you are working in the digital darkroom, keep this quote by Ruth Bernhard in mind: “There is no such thing as spending too much time, because your soul is in picture.”
Here is another Ruth Bernhard quote that applies to the color to black-and-image process: “If you are not willing to see more than is visible, you won’t see anything.”
Tech Info for Opening Image
Camera: Canon 5D Mark III
Lens: Canon 17-40mm lens
Tripod: Really Right Stuff tripod and Really Right Stuff ball head.
Camera settings:
• Manual focus – to maintain sharp because moving waves could change the focus setting, as well as slow down the auto focus process;
• Focus set at 1/3 into the frame – for maximum depth-of-field.
• High frame rate – to capture the subtle differences in the flow and position of the waves;
• ISO 100 – for shooting at long shutter speeds, f/22 – for good depth-of-field, 1/4th second – to blur the movement of the water.
The intrepid and tireless team of Rick & Susan Sammon have produced 38 books and also shoot online classes for KelbyOne. They also lead photo workshops around the world, from Alaska to Antarctica.
“I use RRS tripods and ball heads in front of and behind the camera – because the gear has never let us down.
Rick Sammon
http://ricksammon.com/