by Aaron Baggenstos
One of the most rewarding aspects of my career is being able explore new photographic concepts and teach them to others. This keeps me on a constant journey to photograph in new and innovative ways.
Over the last several months I’ve been experimenting with creative blurs on wildlife. Not only have I learned a lot but I have had a blast practicing with different concepts. Below you will find a few images I have taken along the way and four techniques I used to capture them. I’ve also listed the equipment and camera settings. Keep in mind that there are hundreds of ways to produce creative blurs and this is by no means a comprehensive analysis. My hope is that you will enjoy viewing these images as much as I did creating them, and that they will inspire you to get out and make a few of your own.
- Pan Blurs
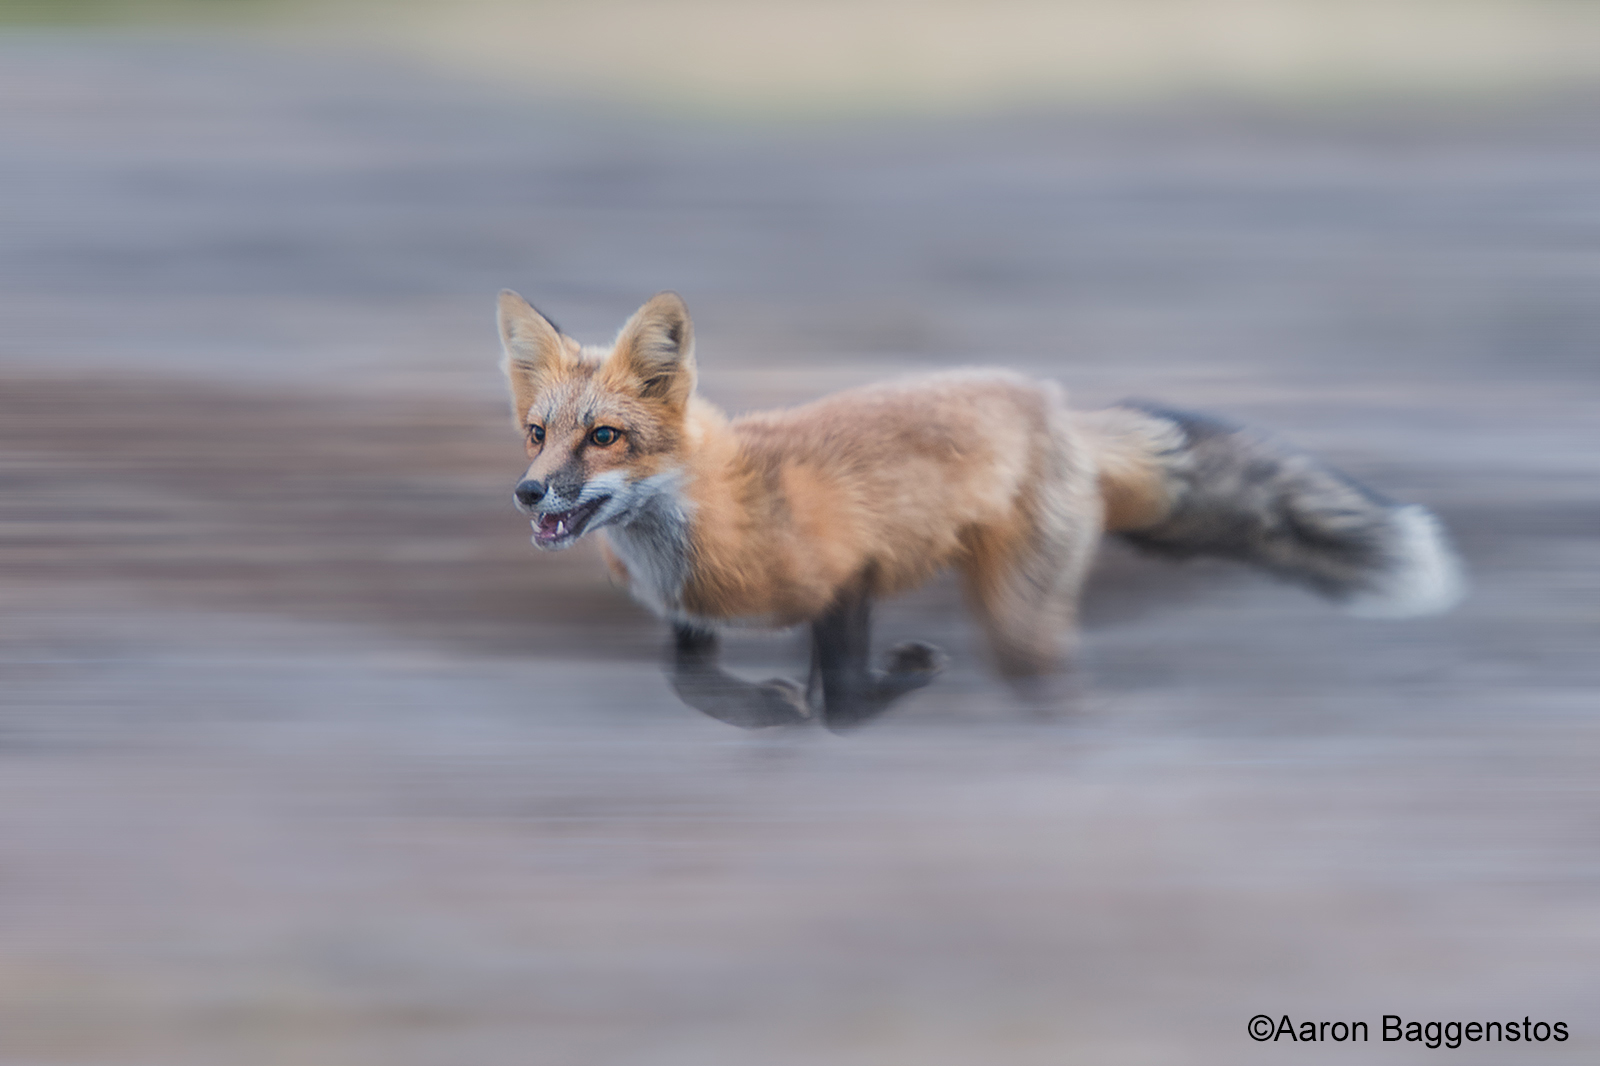
Caption: Pan Blur, Red Fox, San Juan Island, Washington State Equipment: Nikon D500, Nikkor 80-400mm f/4.5-5.6 Lens, TVC-34L Tripod, LC-A13 PKG, TA-3 leveling base, FG-02 Fluid Gimbal Head Settings: F4, 1/100, ISO320
Quick Tip: A universal tip when shooting any kind of creative blur is to have a solid tripod to support your camera. Unwanted vibration is the nemesis of this genre. For the greatest success with pan blurs use a perfectly level tripod and a fluid head. Use a polarizer or neutral density filter on bright days.
This type of blur is fairly popular. The camera settings aren’t difficult to master but, as with all creative blurs, they take incredible patience, practice, and a bit of luck. I often attempt panning images on overcast days, as low light is actually beneficial. My favorite shutter speeds are between 1/10th-1/125th of a second. I usually determine my shutter speed on the fly based on the subject’s speed, distance, and angle of movement.
Experiment with different shutter speeds to dial yourself in before the action occurs. In general, the higher the shutter speed, the less motion blur you will get. The lower the shutter speed, the lower your keeper ratio will be. Once you have your settings, the real secret here is perseverance. At first in an uncontrolled situation you may take a few hundred shots before you get one keeper. Stick with it, you will produce some stunning results.

Caption: Pan Blur, Wildebeest River Crossing, Mara River, Kenya Equipment: Nikon D810, Nikkor 600mm f4 FL Lens, RRS Safari Rig Settings: F20, 1/25, ISO160
- Wing Blurs
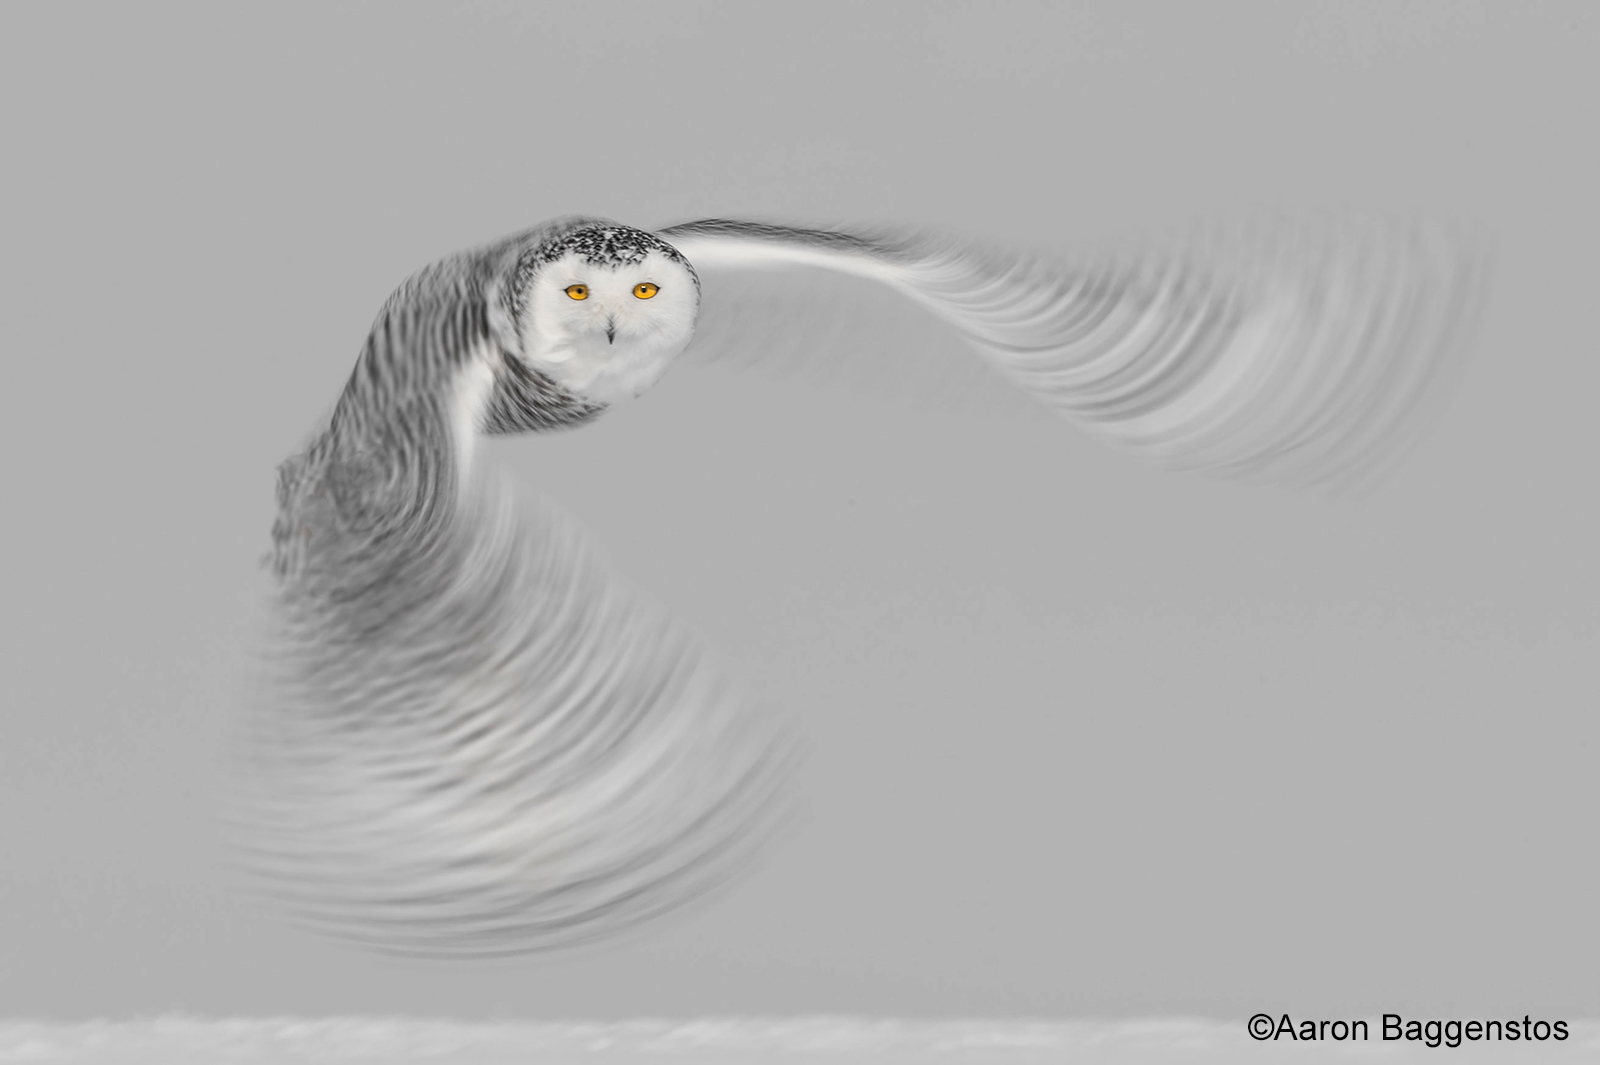
Caption: Wing Blur, Snowy Owl, Alberta, Canada Equipment: Nikon D4S, Nikkor 600mm f4 FL Lens, TVC-34L Tripod, FG-02 Fluid Gimbal Head Settings: F22, 1/50, ISO50
Quick Tip: Use slow shutter speeds around 1/50th of a second on birds in flight for a “wing blur” effect. The desired shutter speed will vary on species and behavior.
Snowy owls are among my favorite birds on the planet. Their massive wings and elegant flight make them a crown jewel for nature photographers. Until recently, I wasn’t a fan of “wing blurs” as I had tried them in the past with little success. Repetition and persistence proved to be the key with this type of image. I took well over 1,000 unusable photos over three weeks in the field to make this one frame. In this case, the high risk came with a high reward.
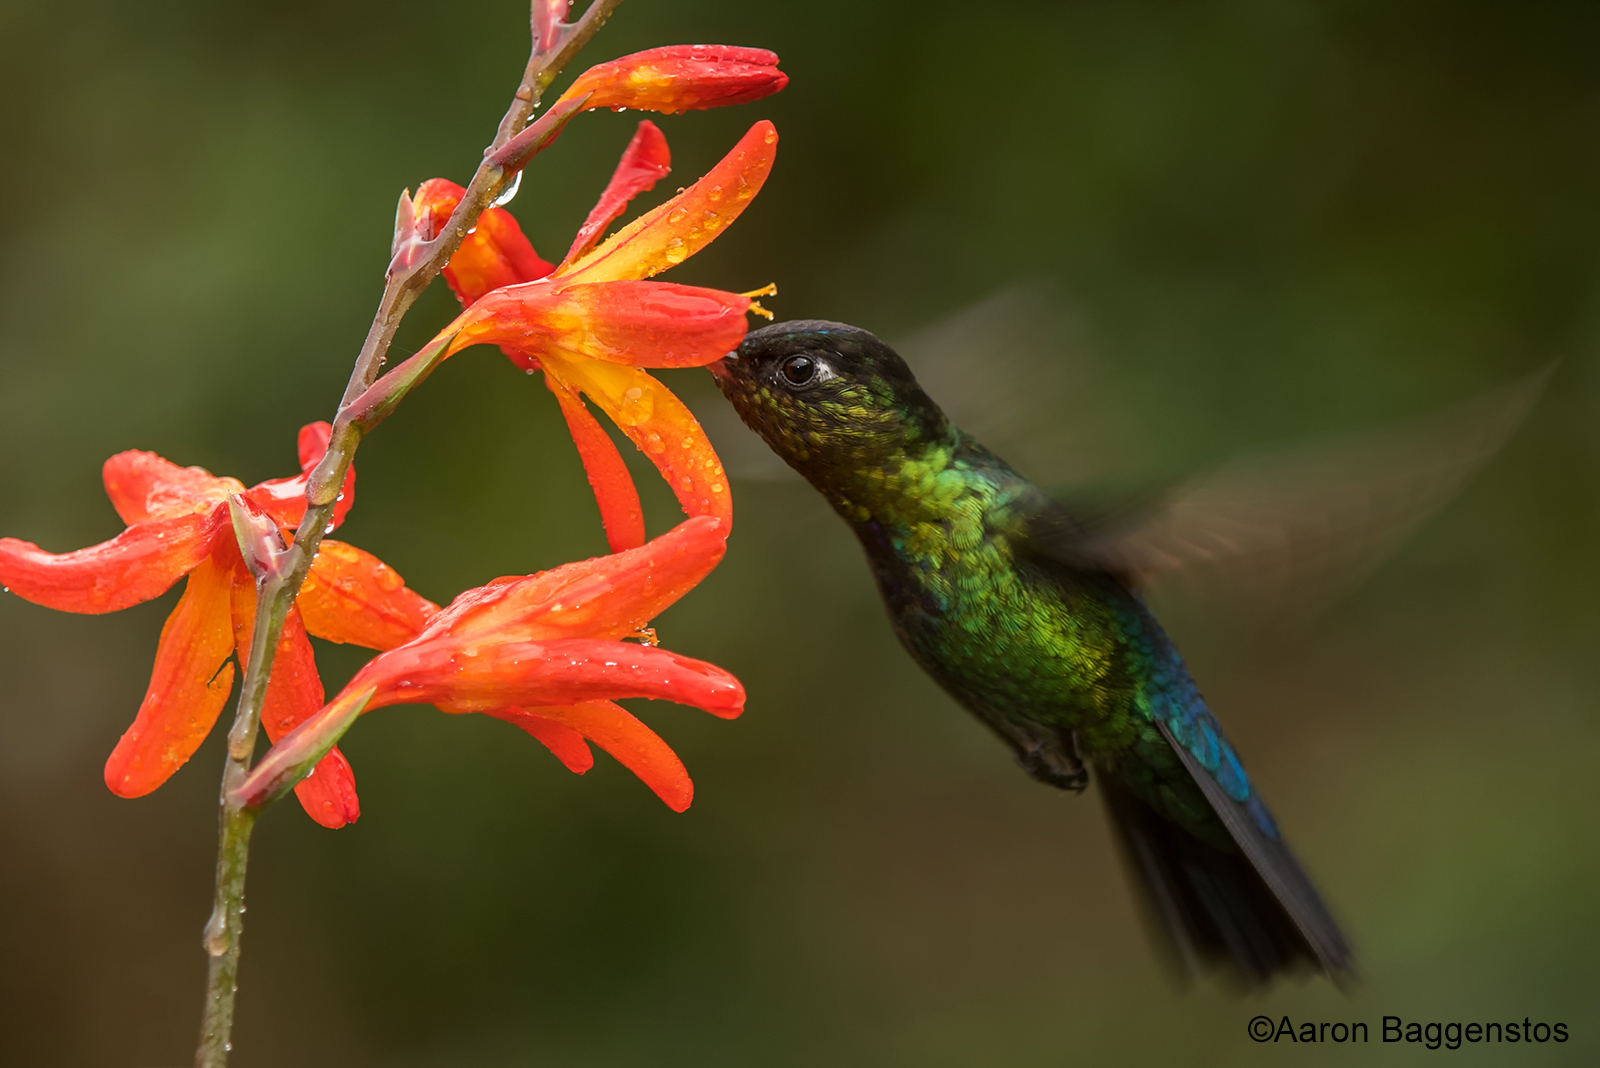
Caption: Wing blur, Hummingbird, Costa Rica Equipment: Nikon D810, Nikkor 70-200mm f2.8 II Lens, LCF-10 Foot, TVC-34L Tripod, FG-02 Fluid Gimbal Head Settings: F8, 1/250, ISO320
- Zoom Blurs
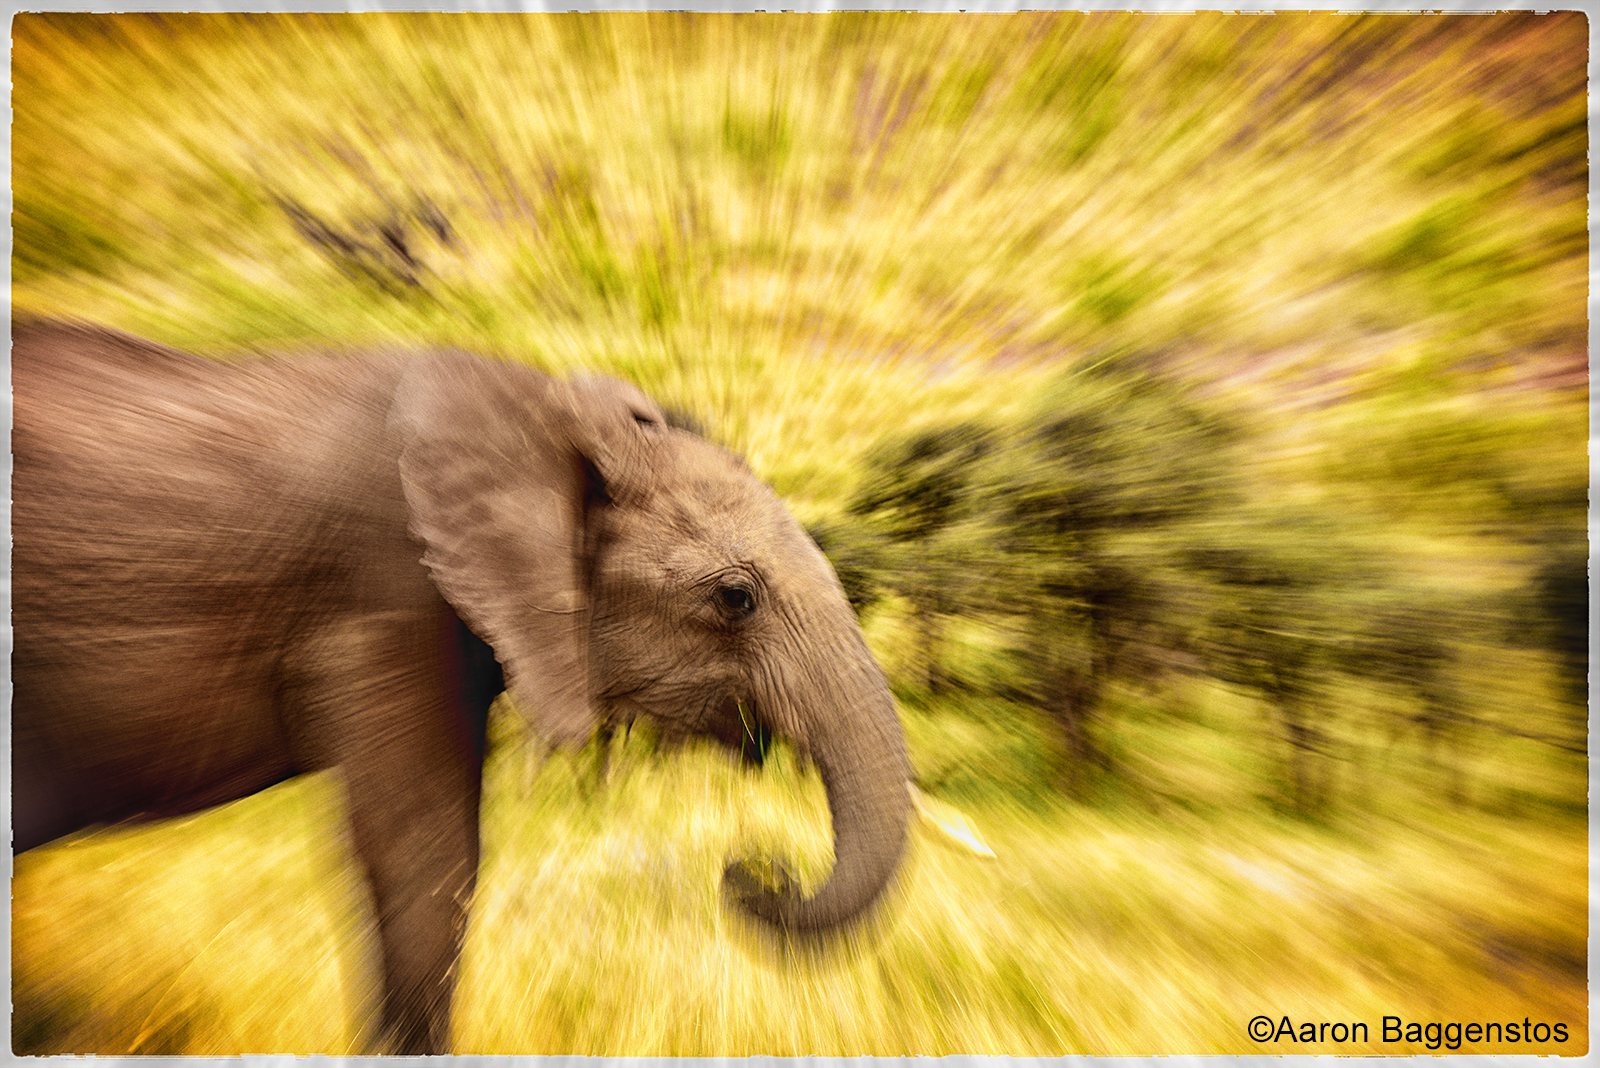
Caption: Zoom Blur, Elephant, Kenya, Africa Equipment: Nikon D810, Nikkor 70-200mm f2.8 II Lens, RRS Safari Rig Settings: F22, 1/25, ISO160, processed using Nik Color Effects Pro
Quick Tip: Try zooming mid exposure to create this alluring effect
Using a zoom lens, you can accomplish this type of image using slow shutter speeds and a tripod. On safari in Africa it’s virtually impossible to use a tripod, so I prefer to shoot off of a monopod mounted to the side of the vehicle using the RRS Safari Rig. That way I have a stable platform for both images and video.
For this technique I recommend practicing on a subject that doesn’t move, like a tree or flower, first. Try a one second exposure allowing the subject to “burn” into the sensor before zooming at the very end to create the streaks. Then try faster shutter speeds like 1/25 and zoom for the duration of the exposure. You will find there is quite a bit of creative control in this technique. One important key here is to position both your subject (usually the eye of the animal) and focal point in the dead center of the frame. That way your streaks lead directly toward your subject. If the focus point is off to the side the lines will point in that direction. Once you get the hang of it try this on more difficult moving subjects.
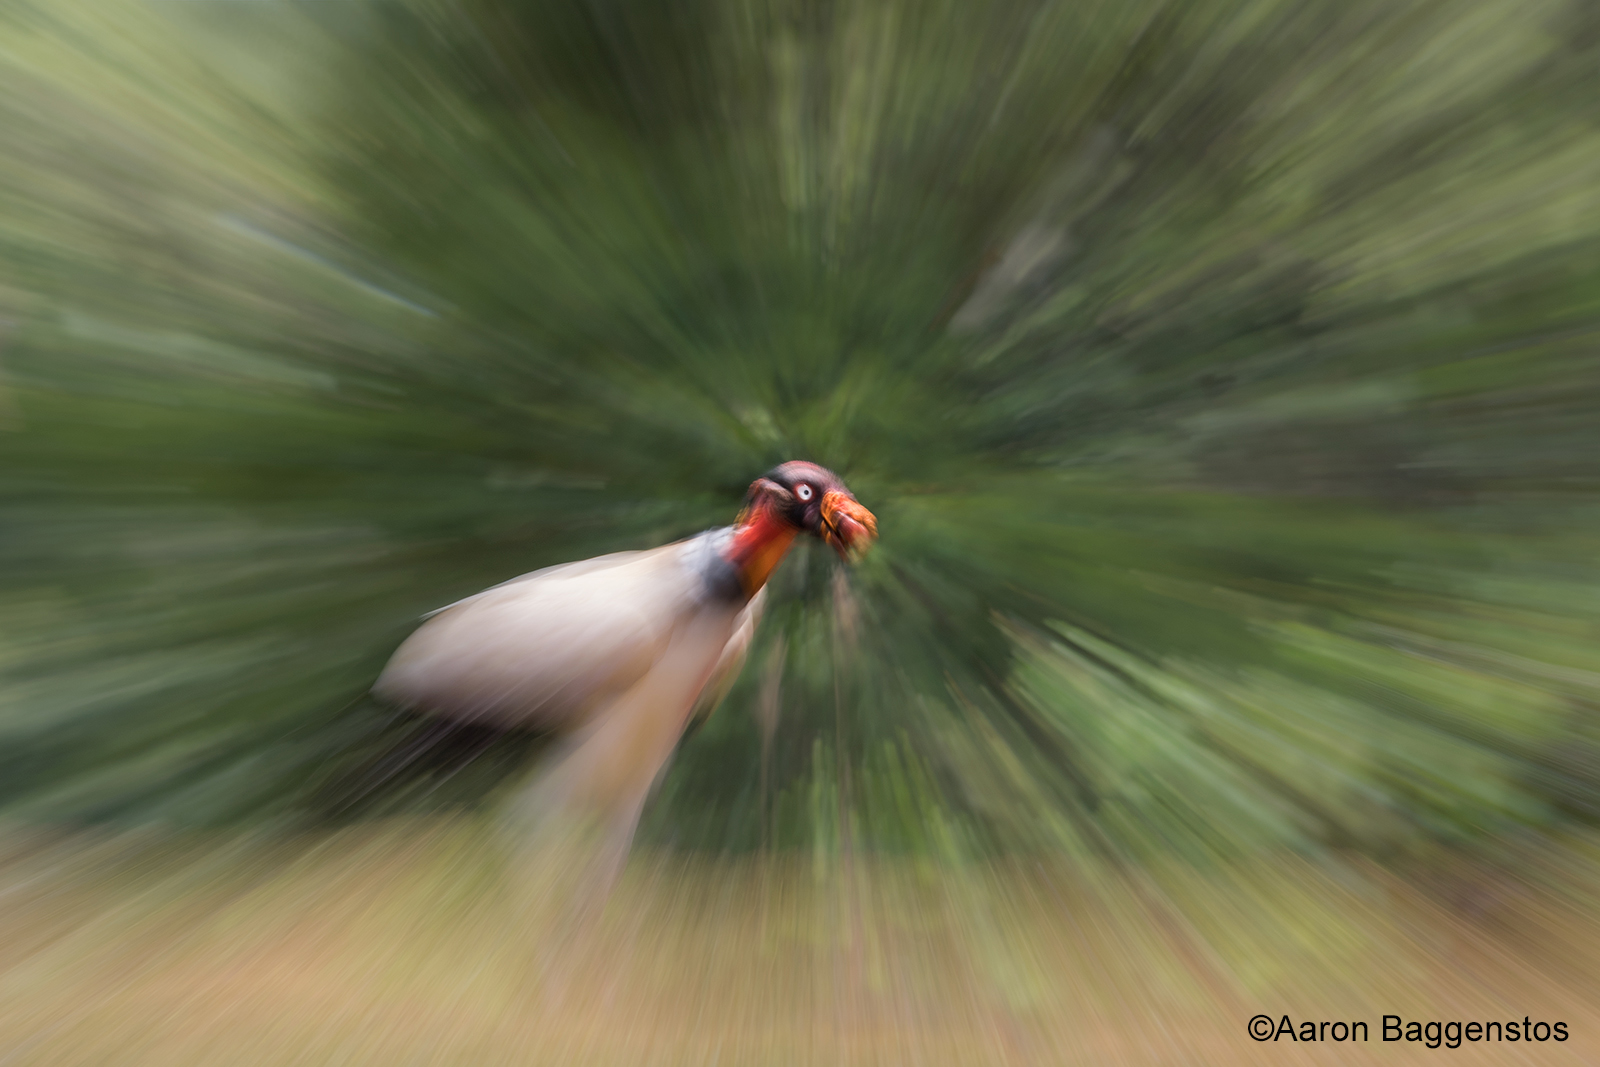
Caption: Zoom Blur, King Vulture, Costa Rica Equipment: Nikon D5, Nikkor 70-200mm f2.8 II Lens, LCF-10 Foot, TVC-34L Tripod, FG-02 Fluid Gimbal Head Settings: F20, 1/10, ISO100
- Water Blurs
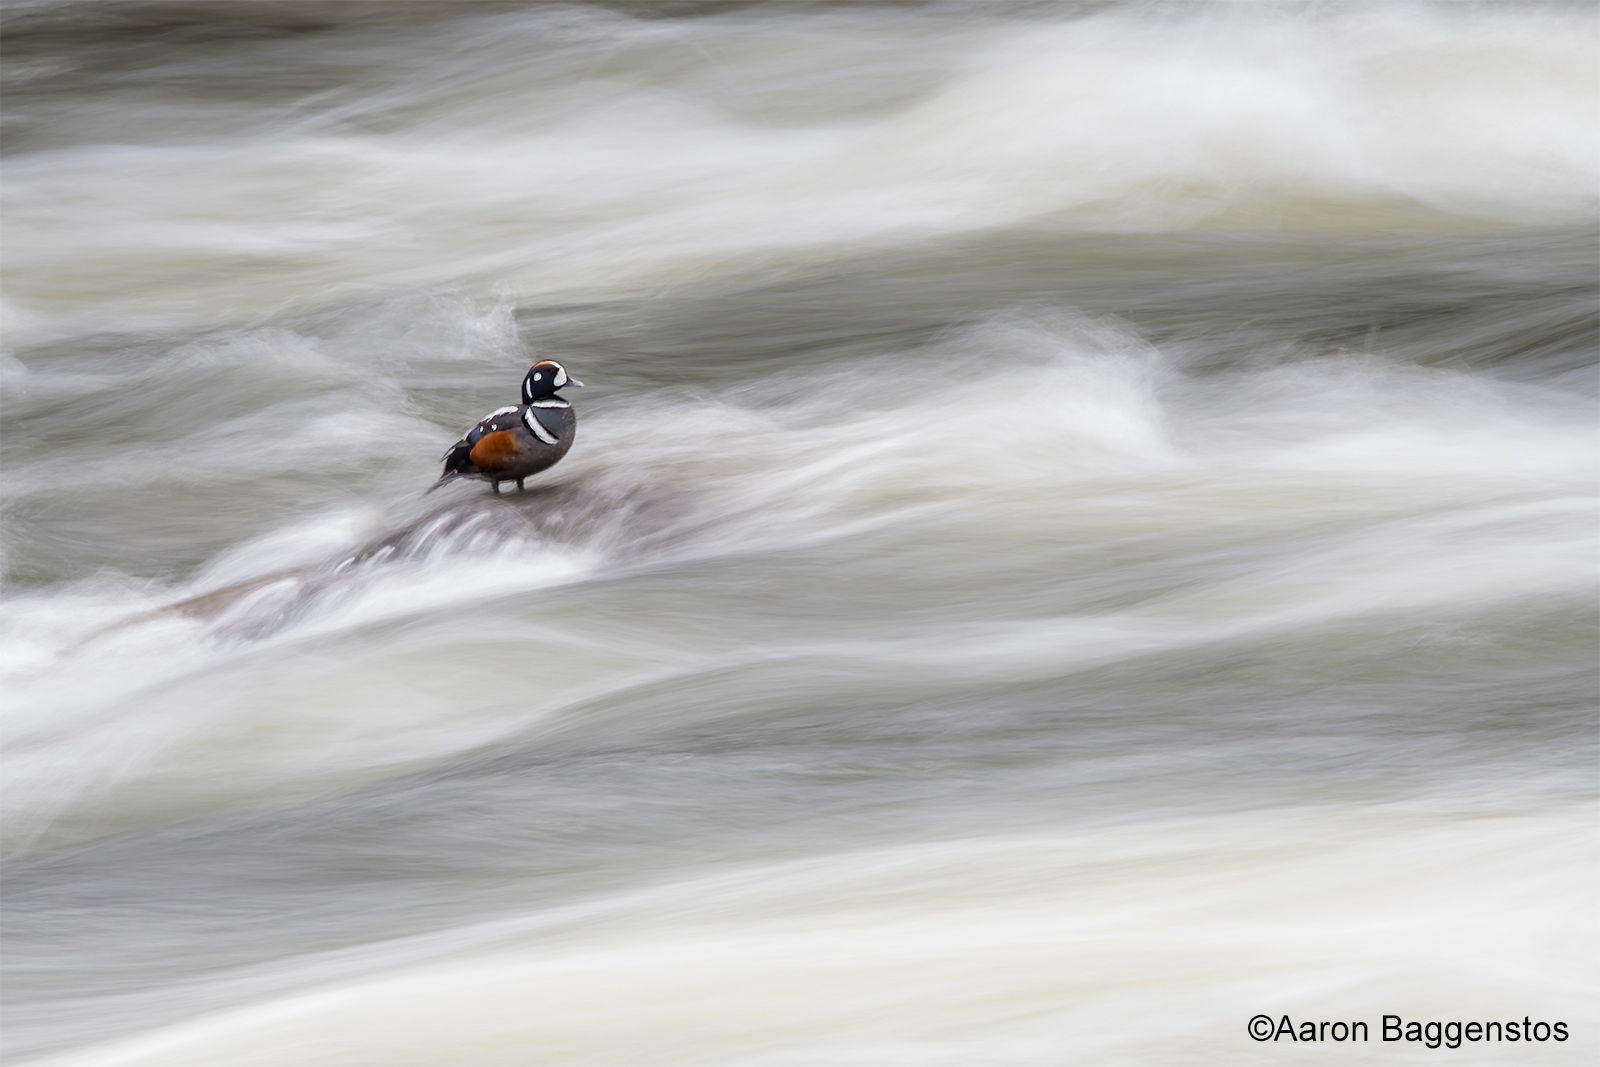
Caption: Water Blur, Harlequin Duck, Yellowstone National Park Equipment: Nikon D500, Nikkor 600mm f4 FL Lens, LCF-18 Foot, TVC-34L Tripod, FG-02 Fluid Gimbal Head, Nikon MC-30A Shutter Release Settings: F22, 1/2, ISO50, Mirror Lockup
Quick Tip: Use a polarizer or neutral density filter and slow shutter speeds to create “cotton candy” water effect. Use mirror lockup to get sharper results.
I shoot this type of image the same way I would a waterfall with an added level of difficulty. If the animal, in this case the harlequin duck, moves at all during a half second exposure, it’s sure to blur and ruin the effect. Again, take lots of frames with the hope that one will come out perfect. Choose a stable platform for your tripod, use a shutter release, and activate mirror lock up to prevent shutter slap. Any small vibration will kill the sharpness of the animal’s appearance.
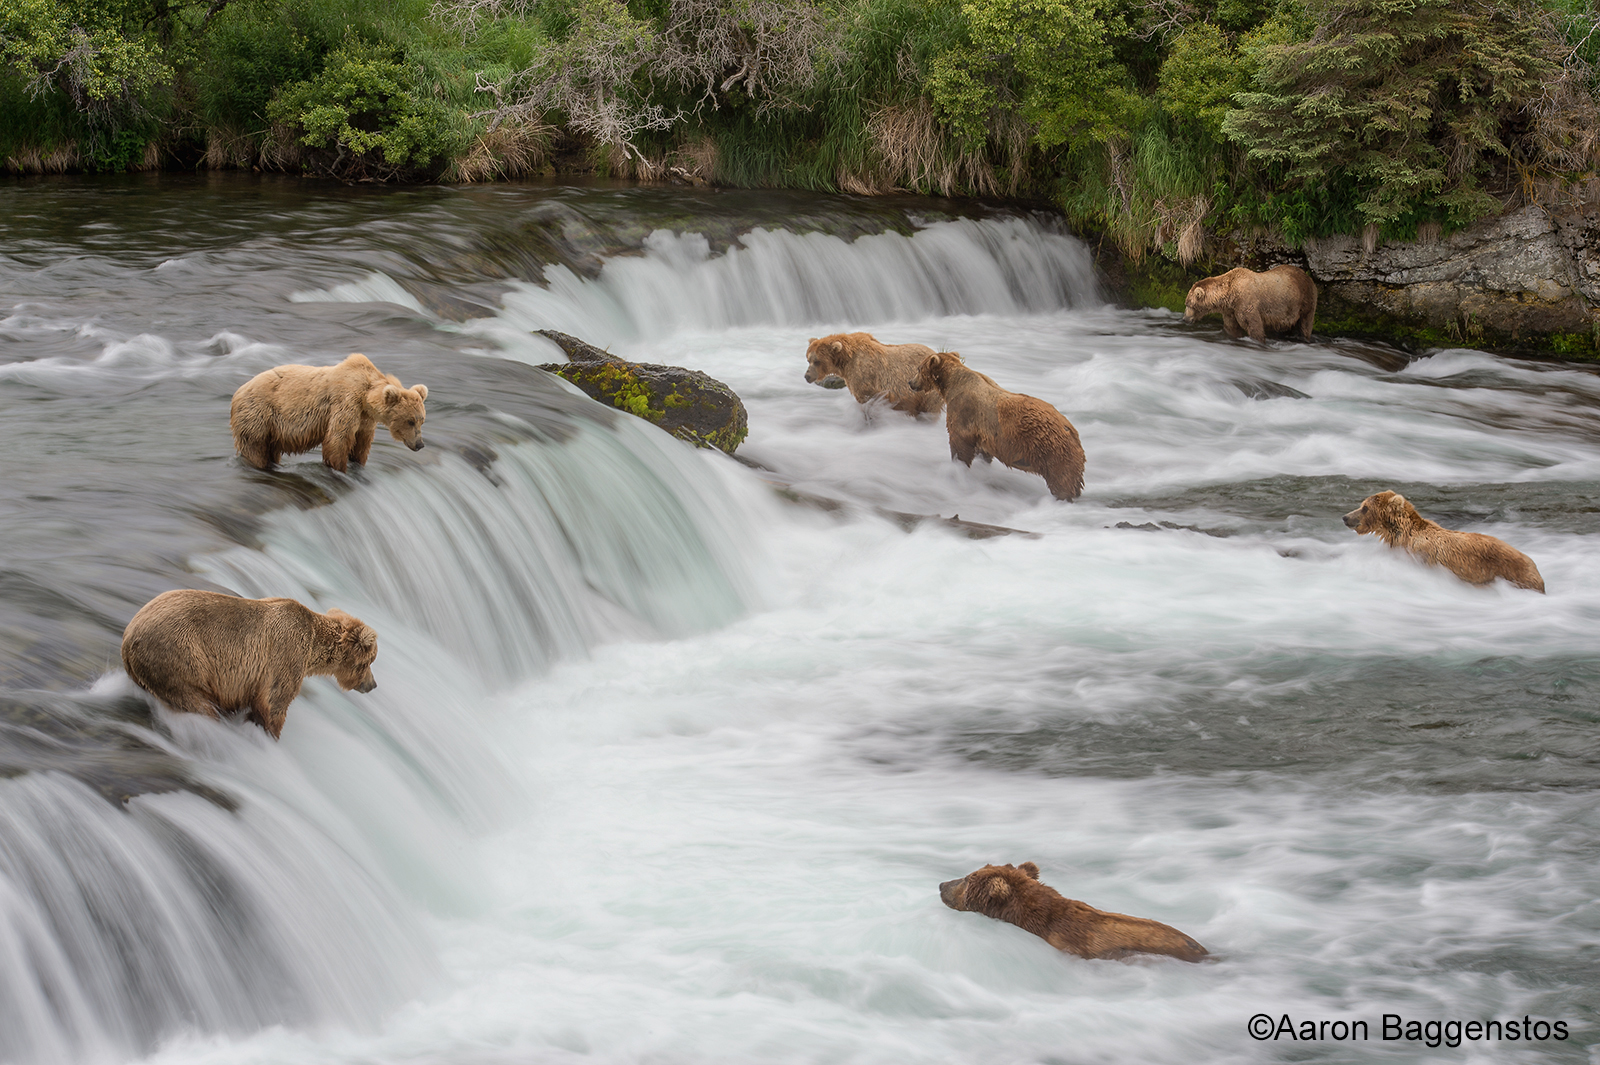
Caption: Water Blur, Brown Bears, Katmai National Park, Alaska Equipment: Nikon D800, Nikkor 70-200mm f2.8 II Lens, LCF-10 Foot, TVC-34L Tripod, Nikon MC-30A Shutter Release Settings: F25, 1/10, ISO100, Mirror Lockup
Conclusion: Creative blurs are a fun and challenging way to produce unique looking images. I have had a blast experimenting with different concepts with some great success. My hope is that these images have inspired you to get out and create a few of your own. See you out there.
—
Aaron Baggenstos is an award-winning professional wildlife photographer from Seattle, Washington. Aaron specializes in leading photography tours and workshops in Alaska, Yellowstone, Costa Rica, and Africa.
His photographs have been recognized by National Geographic, Nature’s Best, Outside, NANPA, and the Audubon Society. Recently, several of his images were chosen for the final rounds in the prestigious 2015 & 2016 BBC Wildlife Photographer of the Year.
You can follow Aaron’s travels on his Website, Instagram, Facebook, Youtube, and Flickr pages.